
How to Sell ETH (Ethereum) for USDT (Tether) on BitForex
Tue, Apr 20th 2021This article provides a step-by-step tutorial on how to sell ETH (Ethereum) for USDT (Tether) through your BitForex.com Spot Trading Account. This guide is for devices compatible with Windows...
Displaying items by tag: Crypto.com
How to Buy OMI - A Step by Step Guide
This is a step-by-step guide on how to buy the OMI token securely. This guide is for devices compatible with Windows 10 and newer, MacOS 10.11 and higher, Android OS, and Apple iOS.
The OMI token "serves as a medium of exchange," where you buy, sell, or trade your digital collectibles on the VeVe app.[1] ECOMI Technologies PTE Ltd, based out of Singapore initially listed their OMI token through BitForex.com[2] on May 13, 2019.
Contents
Step 1 - Create a Fiat Wallet With a Crypto Exchange (This guide will use Crypto.com)
Step 2 - Purchase Ethereum
Step 3 - Create a BitForex Wallet and Setup Security Settings
Step 4 - Register BitForex.com Wallet in Crypto.com Wallet
Step 5 - Transfer Ethereum to BitForex Wallet
Step 6 - Transfer Ethereum to Spot Wallet
Step 7 - Buy USDT tokens
Step 8 - Buy OMI token
The initial step is to get a crypto-fiat wallet so that you can purchase Ethereum cryptocurrency with U.S. dollars. If you already have Ethereum, go to Step 3.
Step 1 - Create a Fiat Wallet with a Crypto Exchange
a) U.S. Citizens (excludes New York)
i) Create a Crypto.com Wallet Please use the referral code xkh64rqrh2
b) U.S. Citizens (excludes Alabama, Rhode Island, and Hawaii)
i) Create a Binance.us Wallet
c) International (excludes U.S. citizens)
i) Create a Binance.com Wallet
Step 2 - Purchase Ethereum
Be forewarned this is the step that can be burdensome because your cryptocurrency purchase may get blocked depending on your bank/credit card company's policy on cryptocurrency purchases. This may result in many irate calls to your bank requesting them to take a hold off of your account. Some may refuse and you may need to change banks. USAA is a great bank that allows cryptocurrency purchases.
Note: I recommend you use a debit card by Visa.
a) Log in to Crypto.com App and select Trade
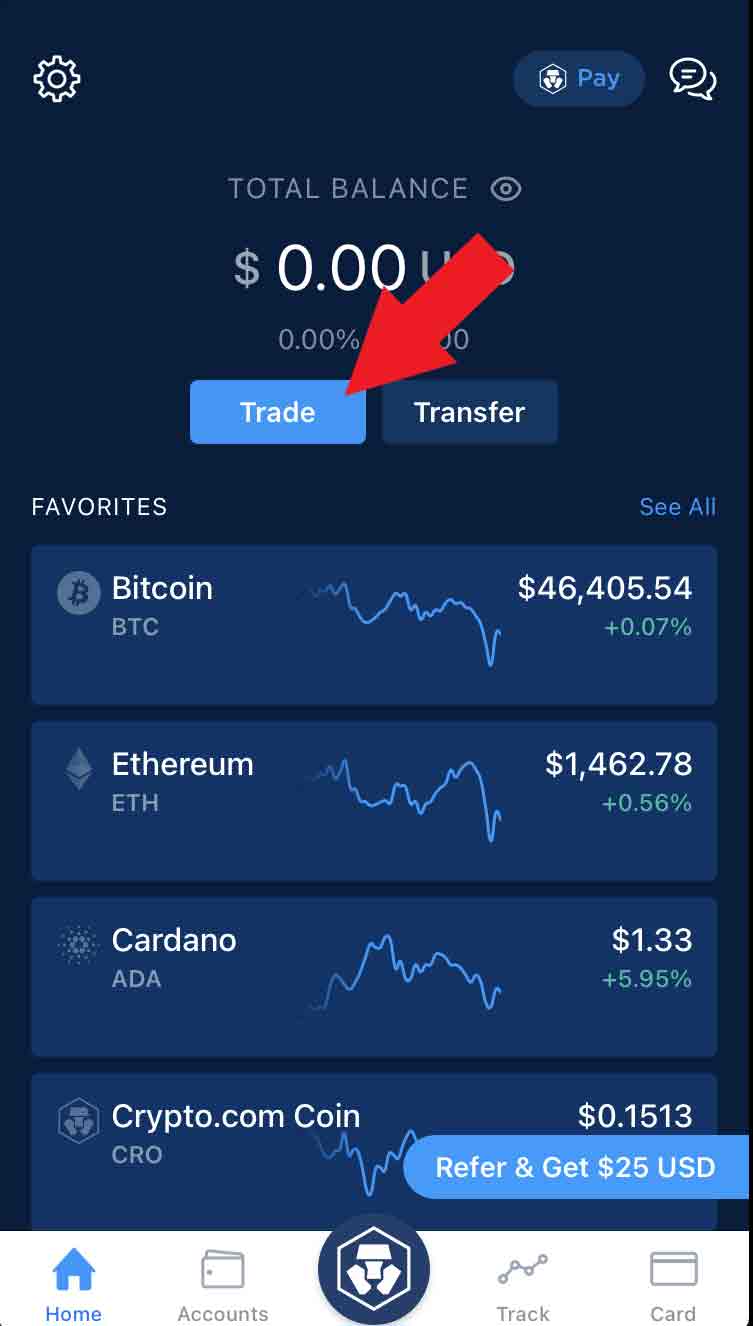
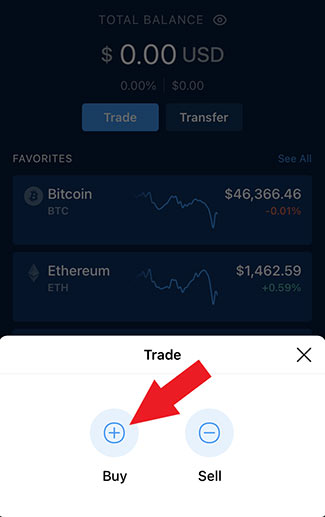
b) Select Buy
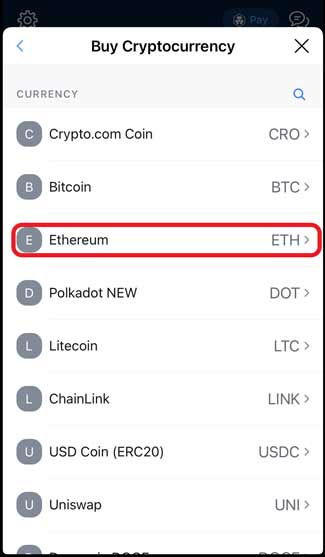
c) Select Ethereum
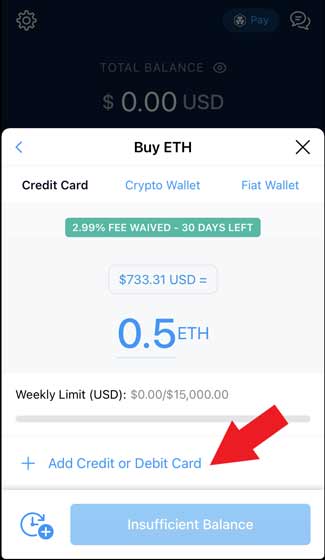
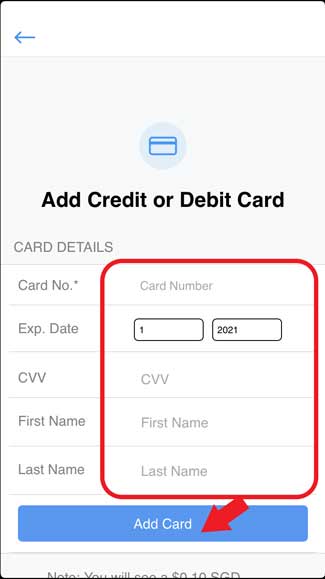
d) Select + Add Credit or Debit Card
e) Input your card information and select Add Card
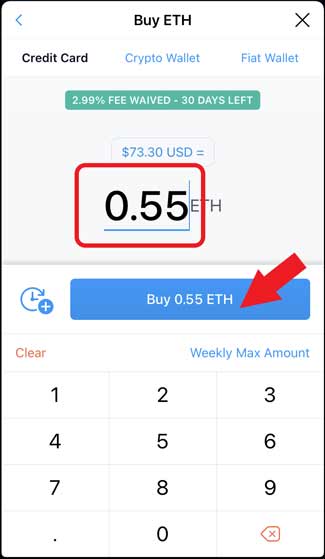
f) Input the amount of Ethereum to purchase and select Buy (Amount) ETH
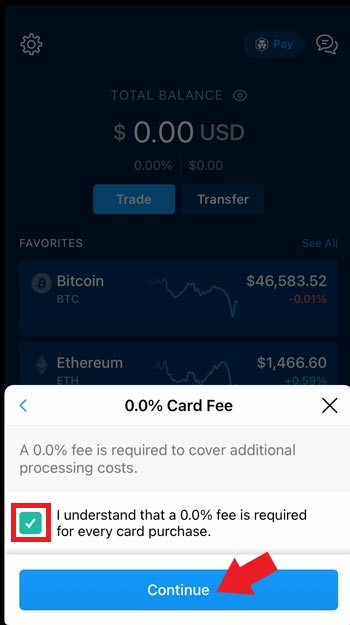
g) Select the box I understand that a 0.0%(Note the example is during a no-fee promotion) is required for every card purchase and select Continue
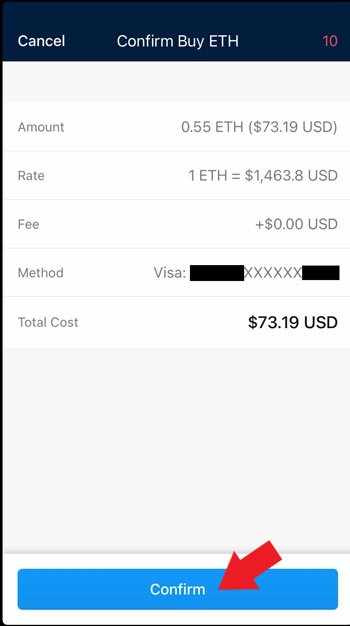
h) Select Confirm
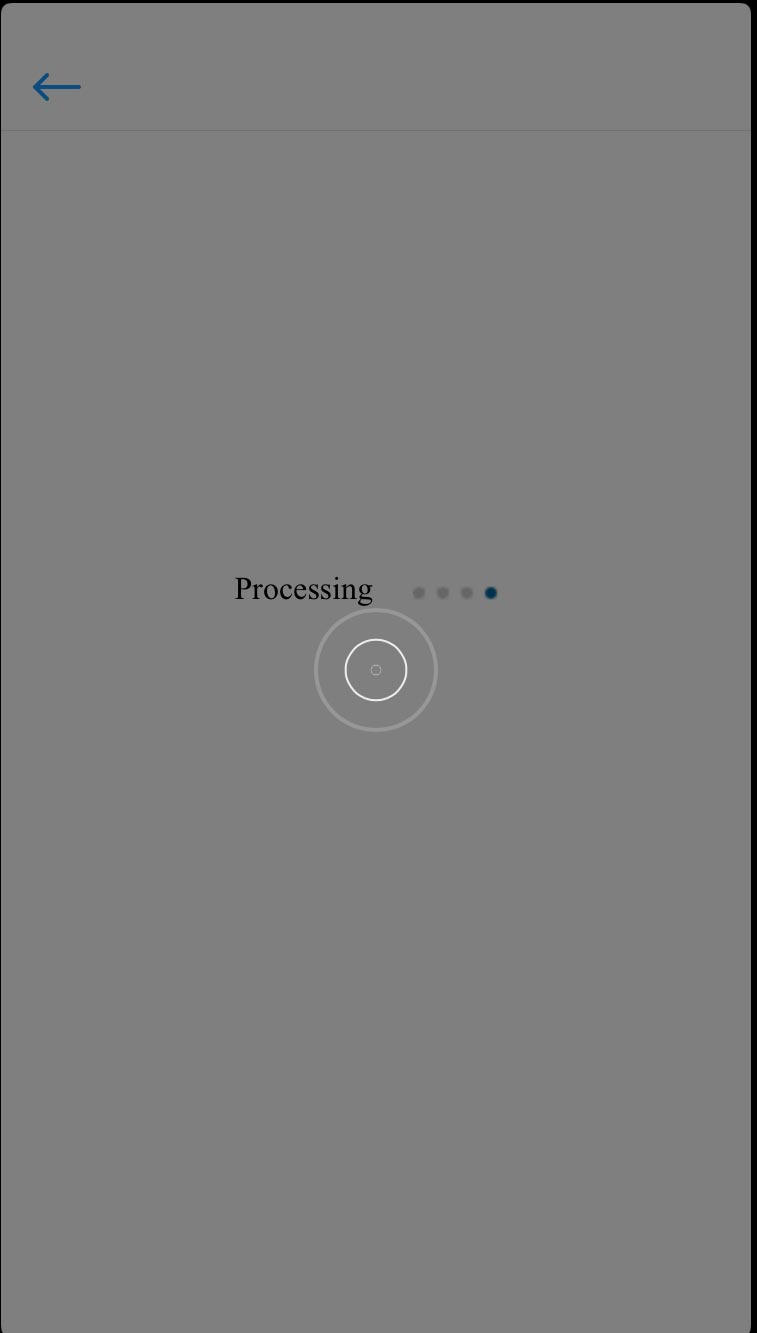
i) Processing screen will appear
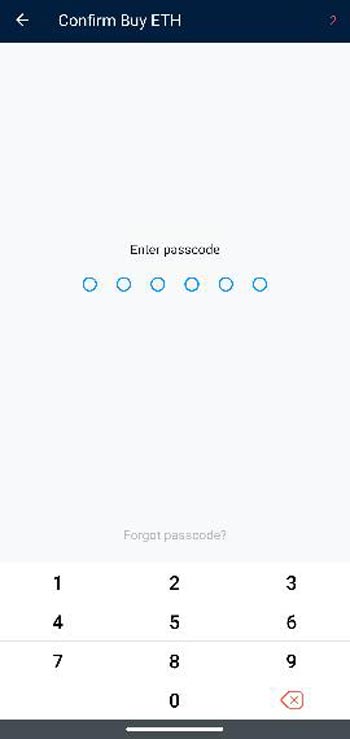
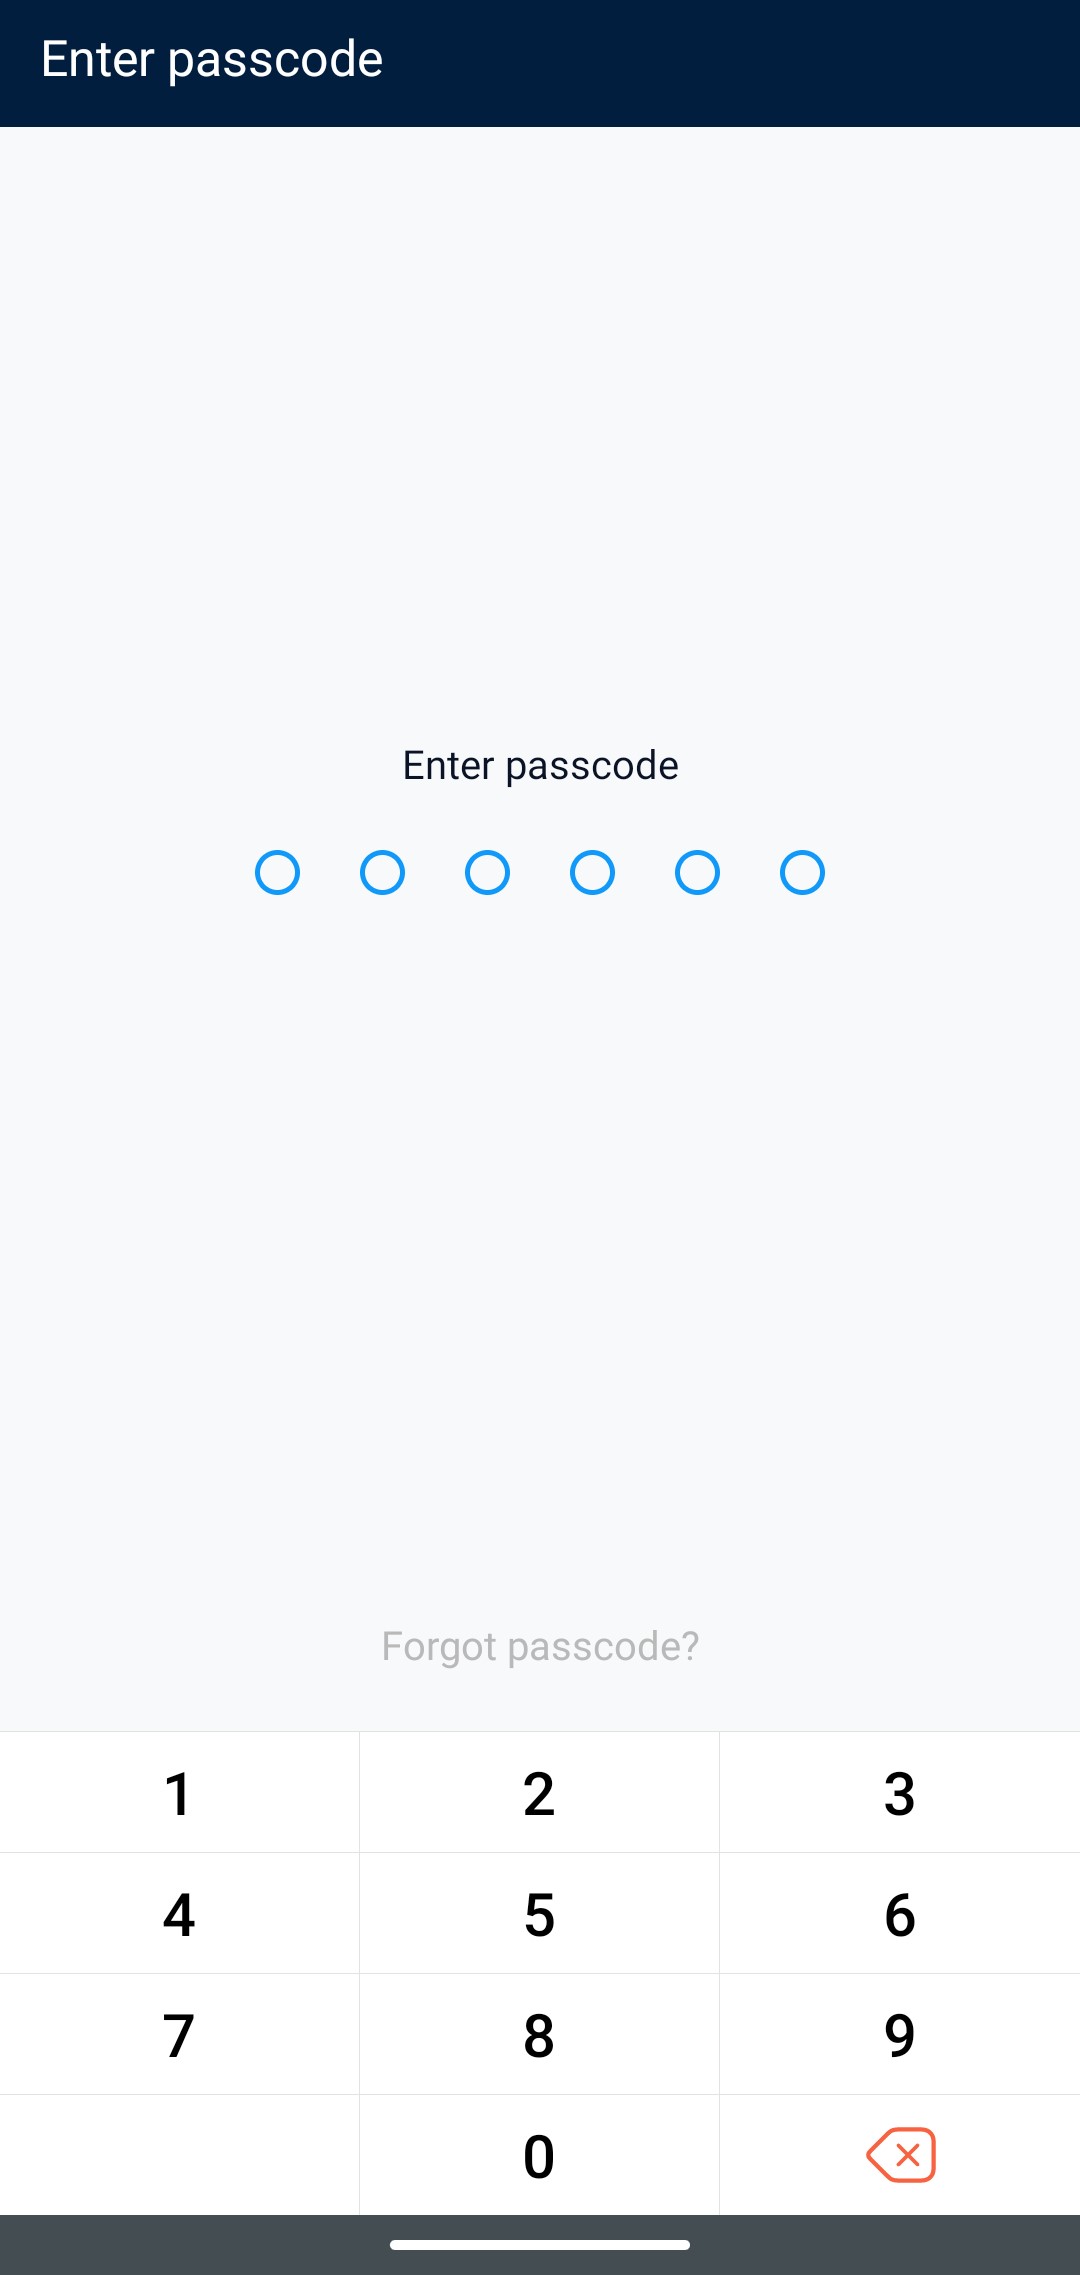
j) Enter Passcode
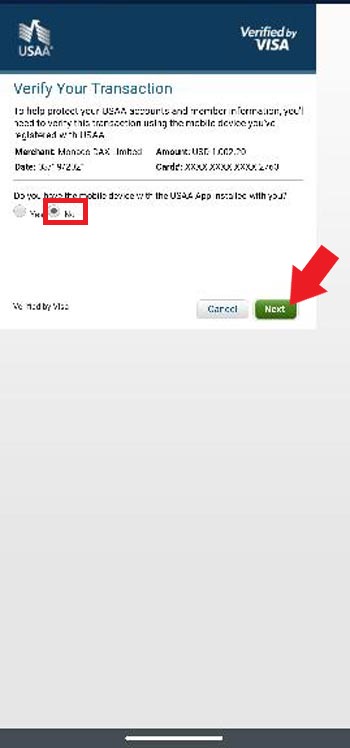
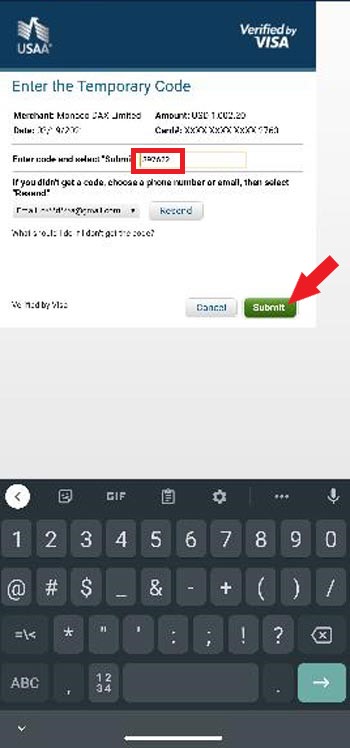
k) Verify your transaction (this is an example from USAA)
i) Select No(so that you can conduct the transaction on the App) and select Next
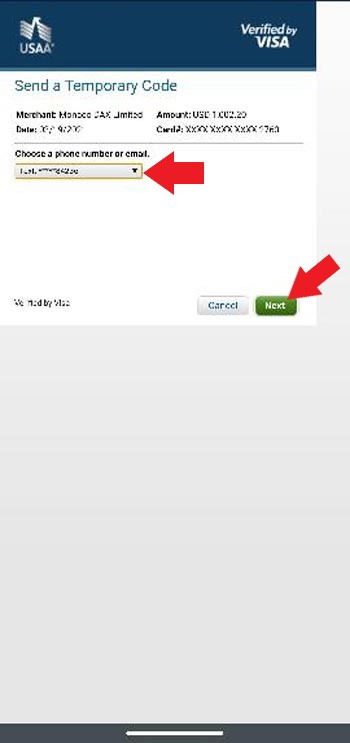
ii) Select how your temporary code gets sent to you via email or phone text and select Next
iii) Enter the temporary code (Received through email or text) and select Submit
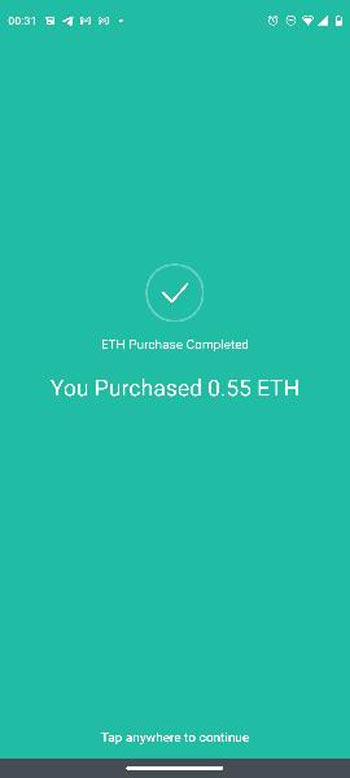
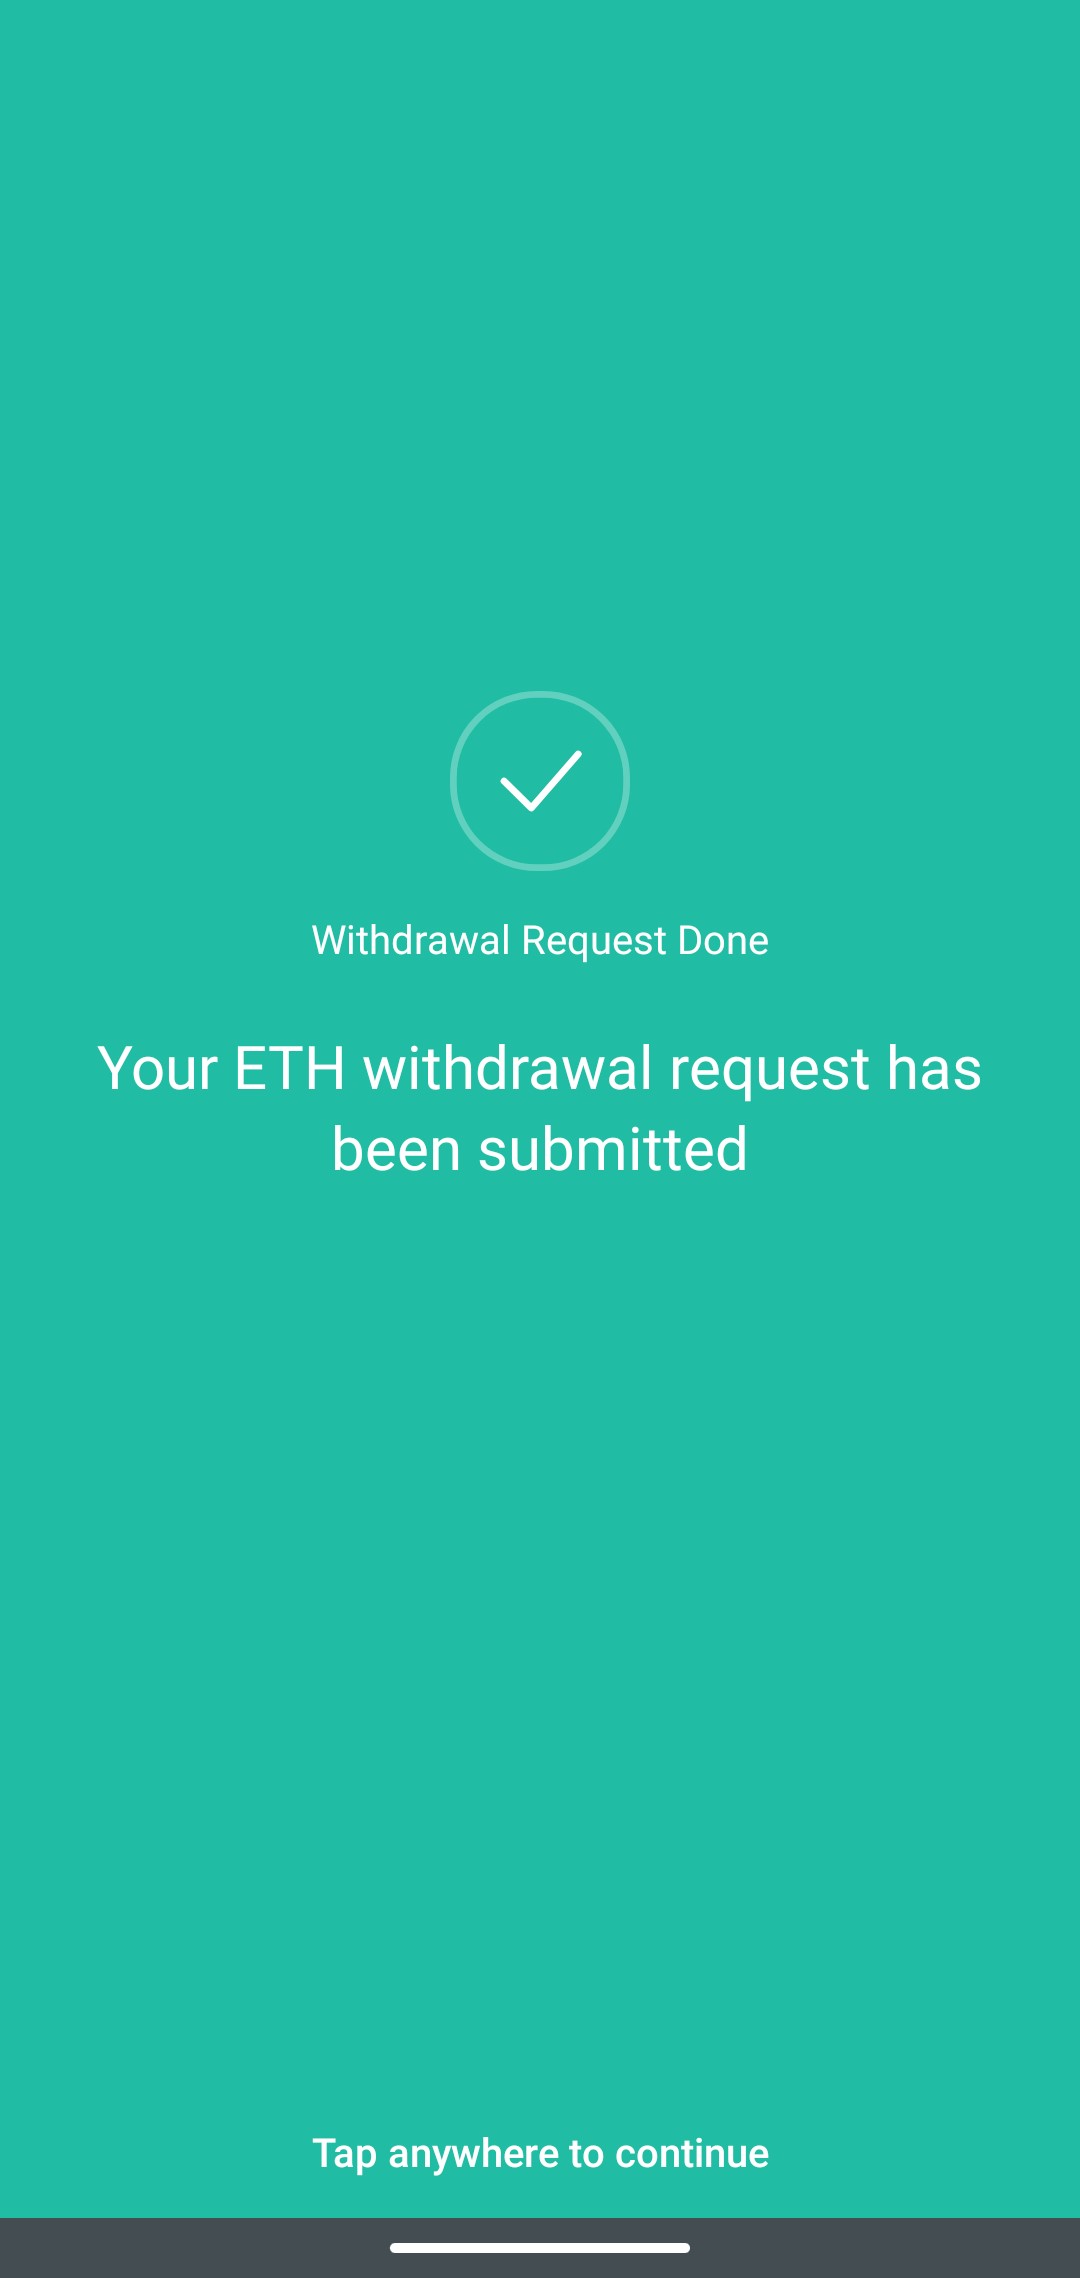
l) You have successfully purchased Ethereum and will get the following message.Tap anywhere to close the message.
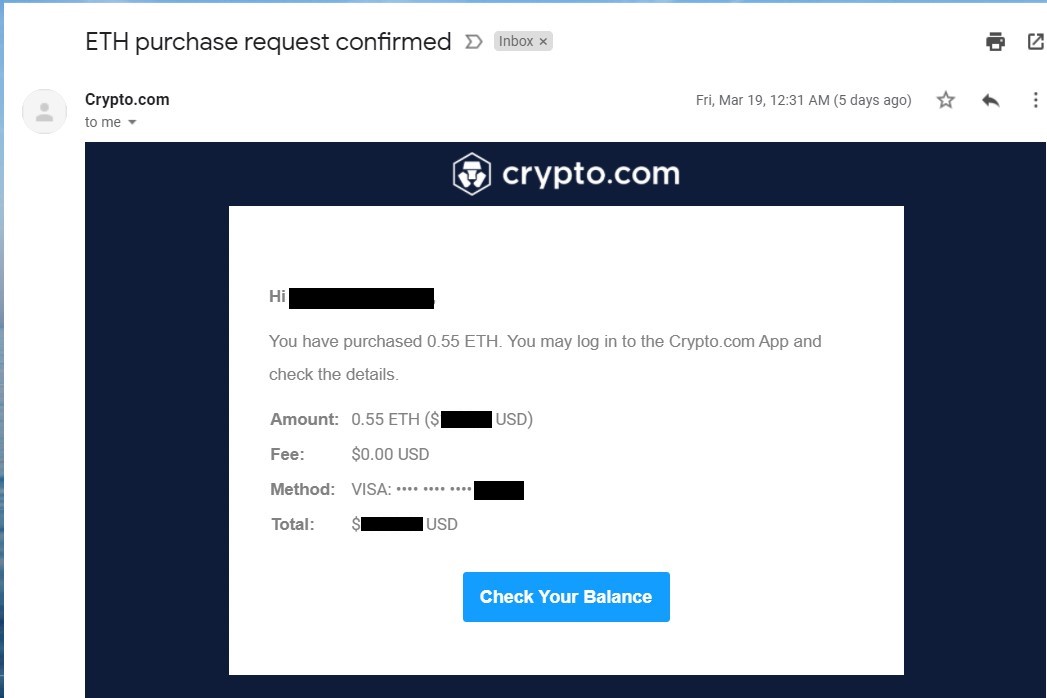
m) You will receive an email from Crypto.com confirming your purchase. Note: It may take a while for your transaction to go through (sometimes 2+ hours)
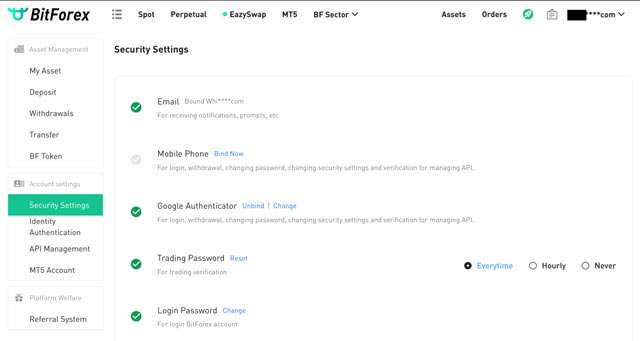
Step 3 - Create a BitForex Wallet and Setup Security Settings
Prior to performing this step, you must have Google Authenticator installed on your mobile phone.
a) Create a BitForex Wallet and Spot Trading Account
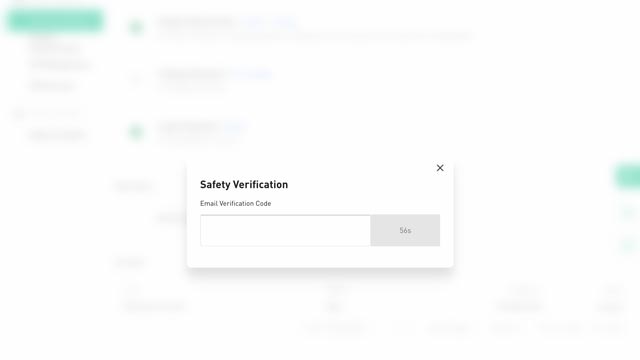
b) Setup Google Authenticator secondary passcode
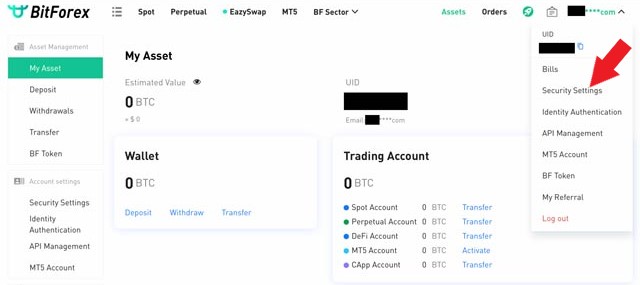
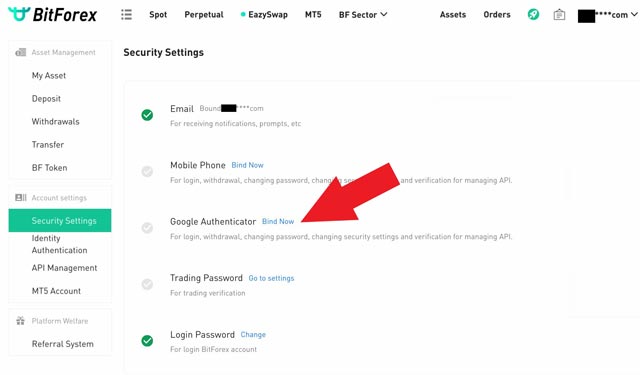
i) Click on the dropdown

ii) SelectSecurity Settings
iii) Click on Bind Now under Google Authenticator
iv) Click Send (a verification code will be sent to your email address)
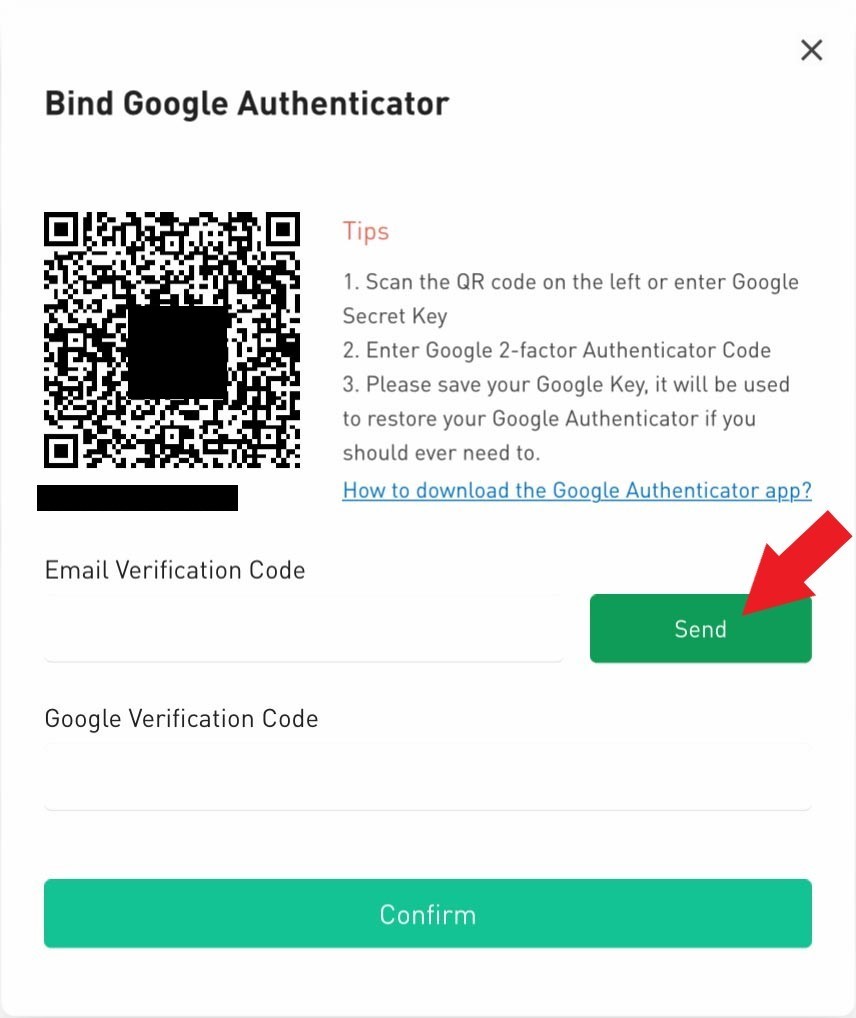
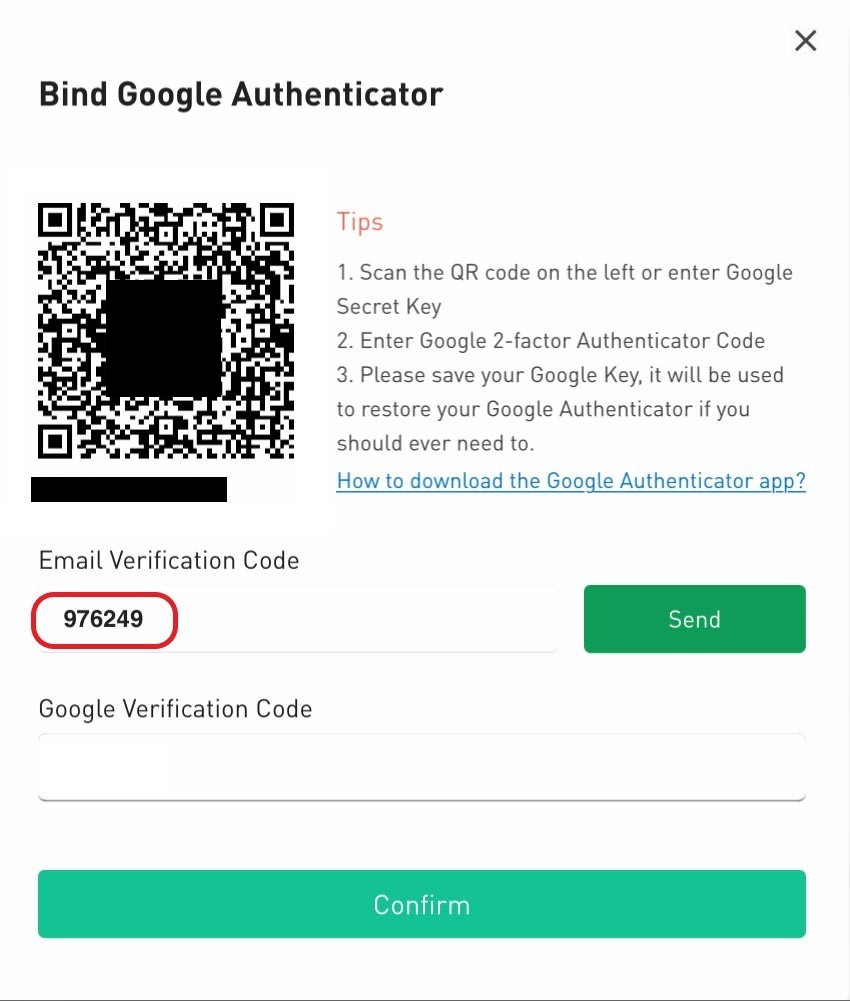
v) Enter the Email Verification Code
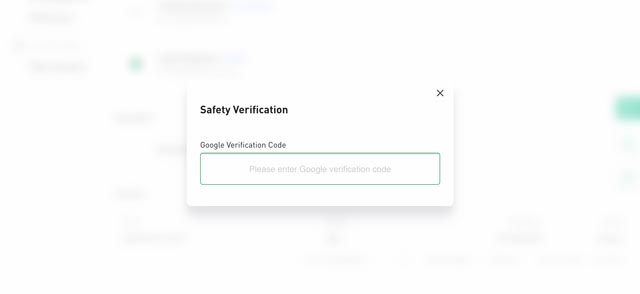
vi) Open the Google Authenticator App and click +. You must have Google Authenticator installed on your mobile phone in order to complete this step.
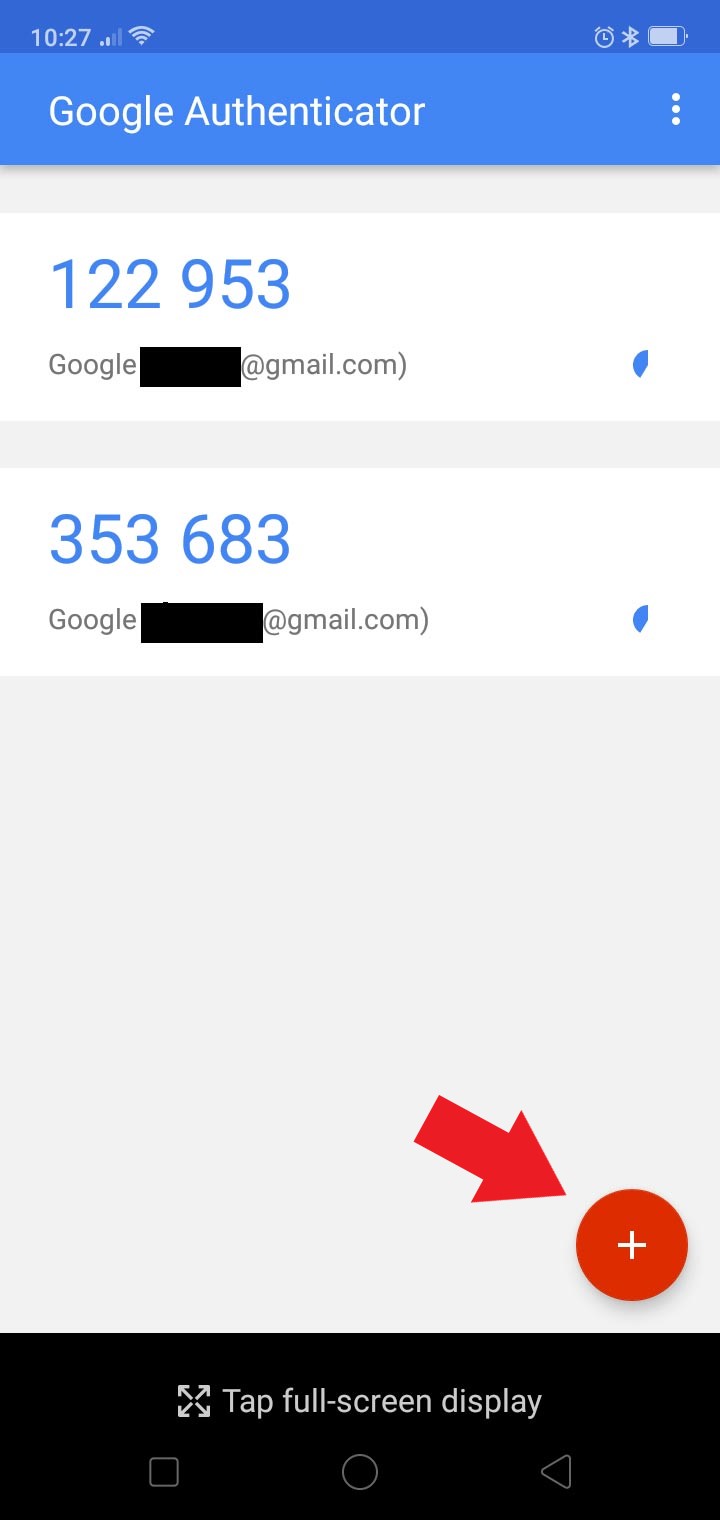
vii) Scan the QR code. A new line item Bitforex (This email address is being protected from spambots. You need JavaScript enabled to view it.) will appear.
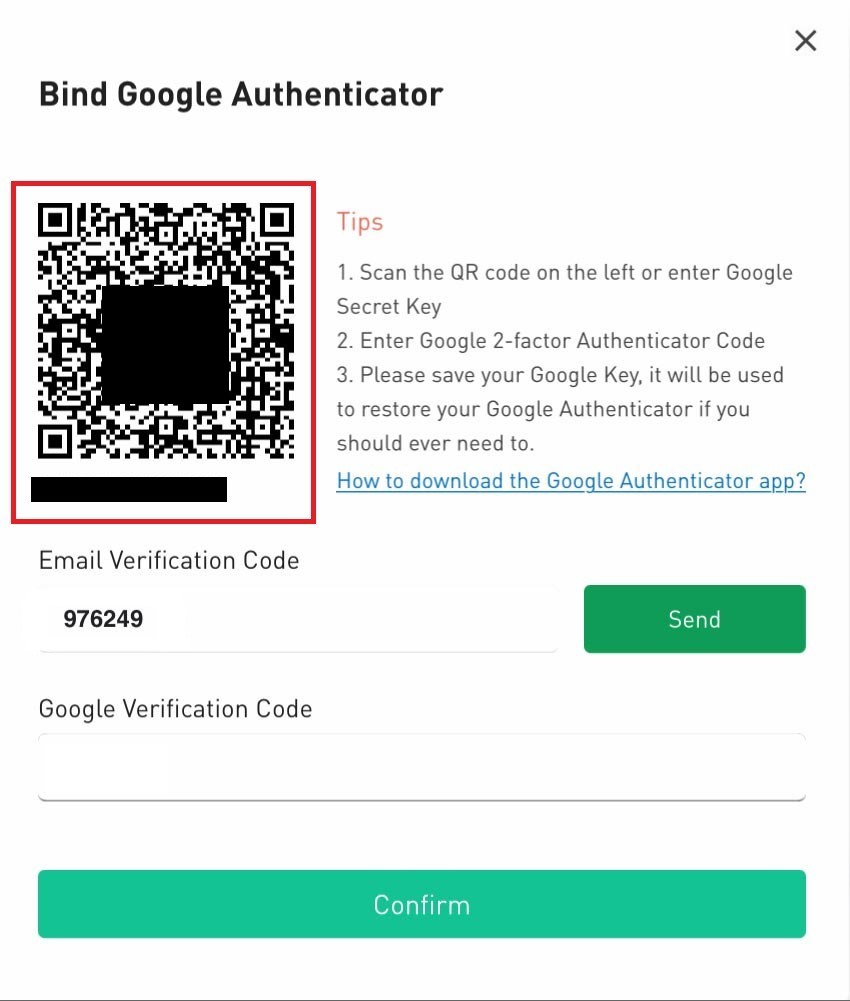
viii) Enter the Google Verification Code from the Google Authenticator Bitforex code and select Confirm
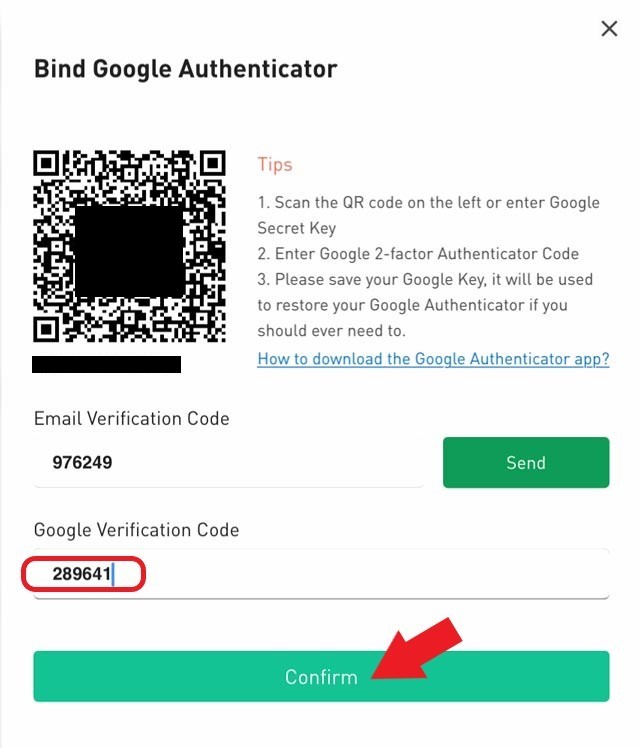
ix) Once complete, the Google Authenticator will have a Checkmark
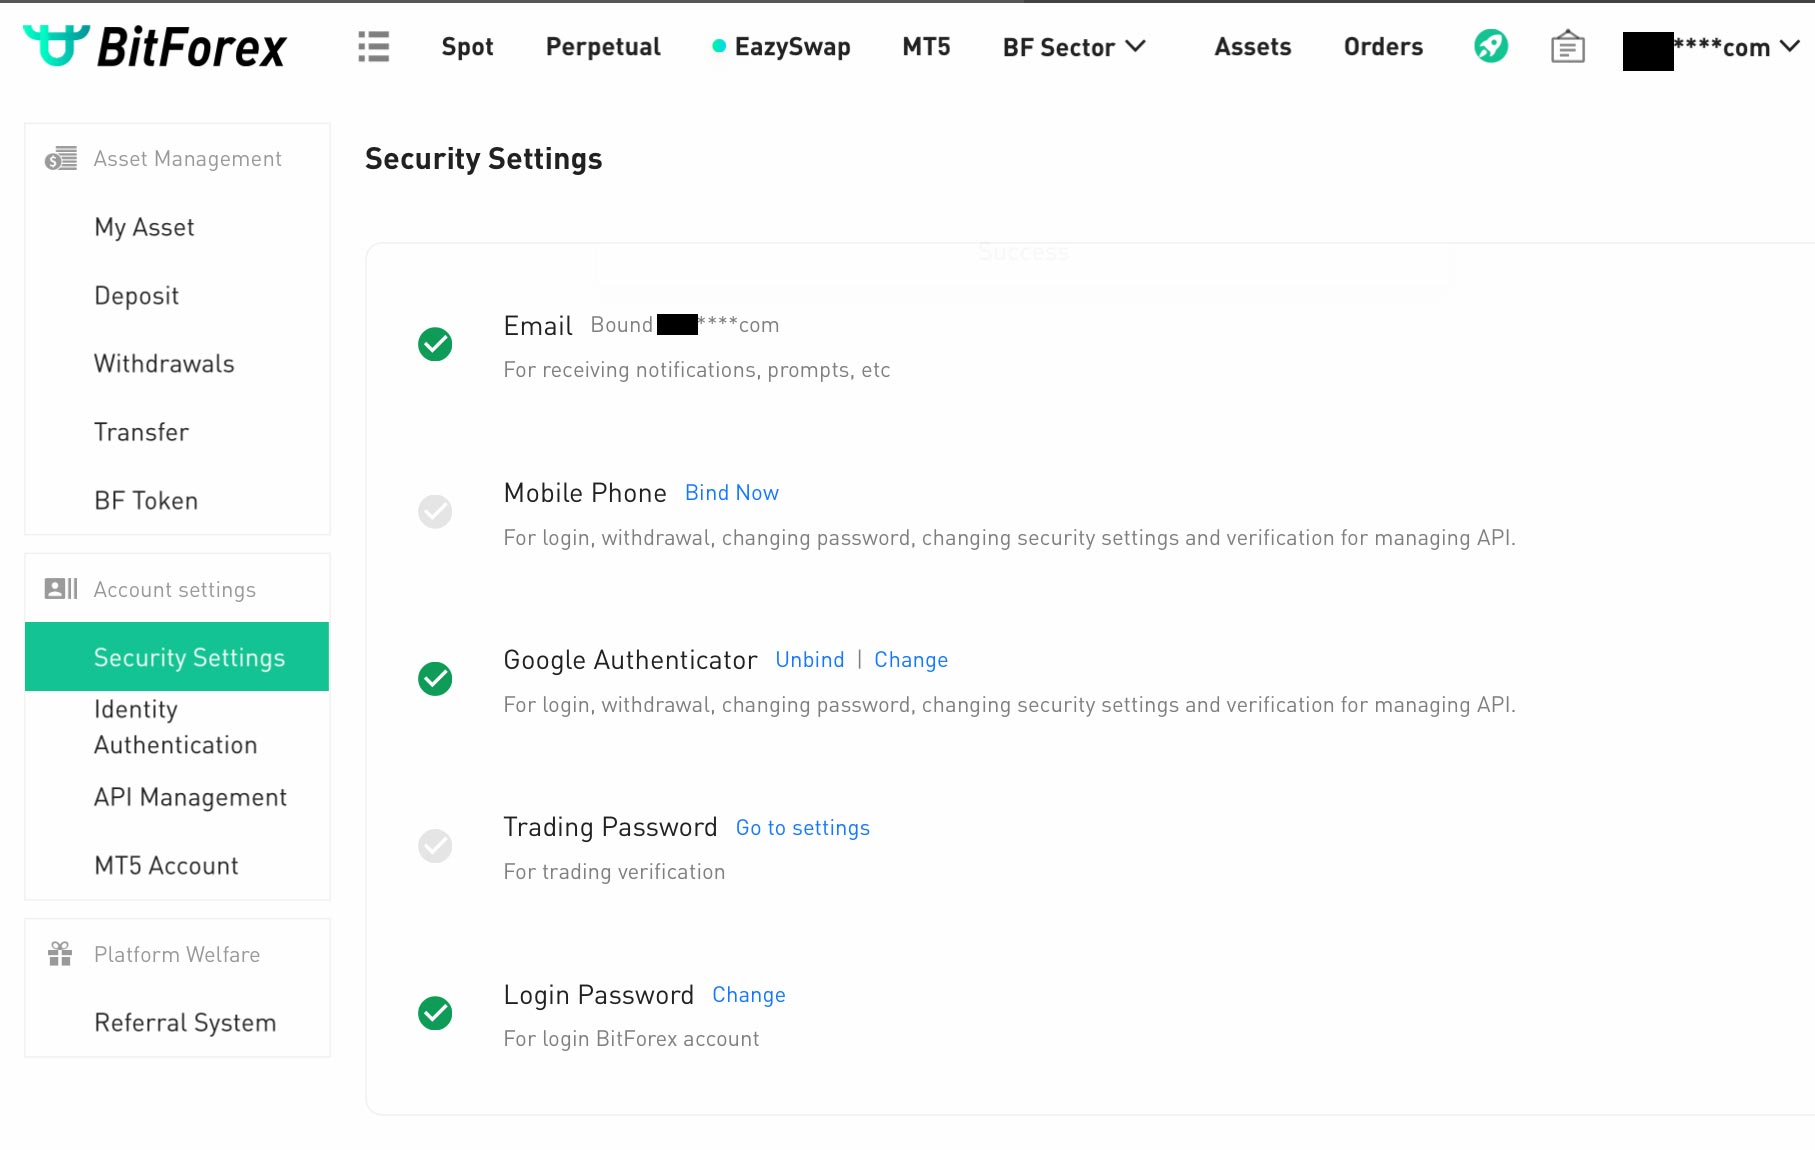
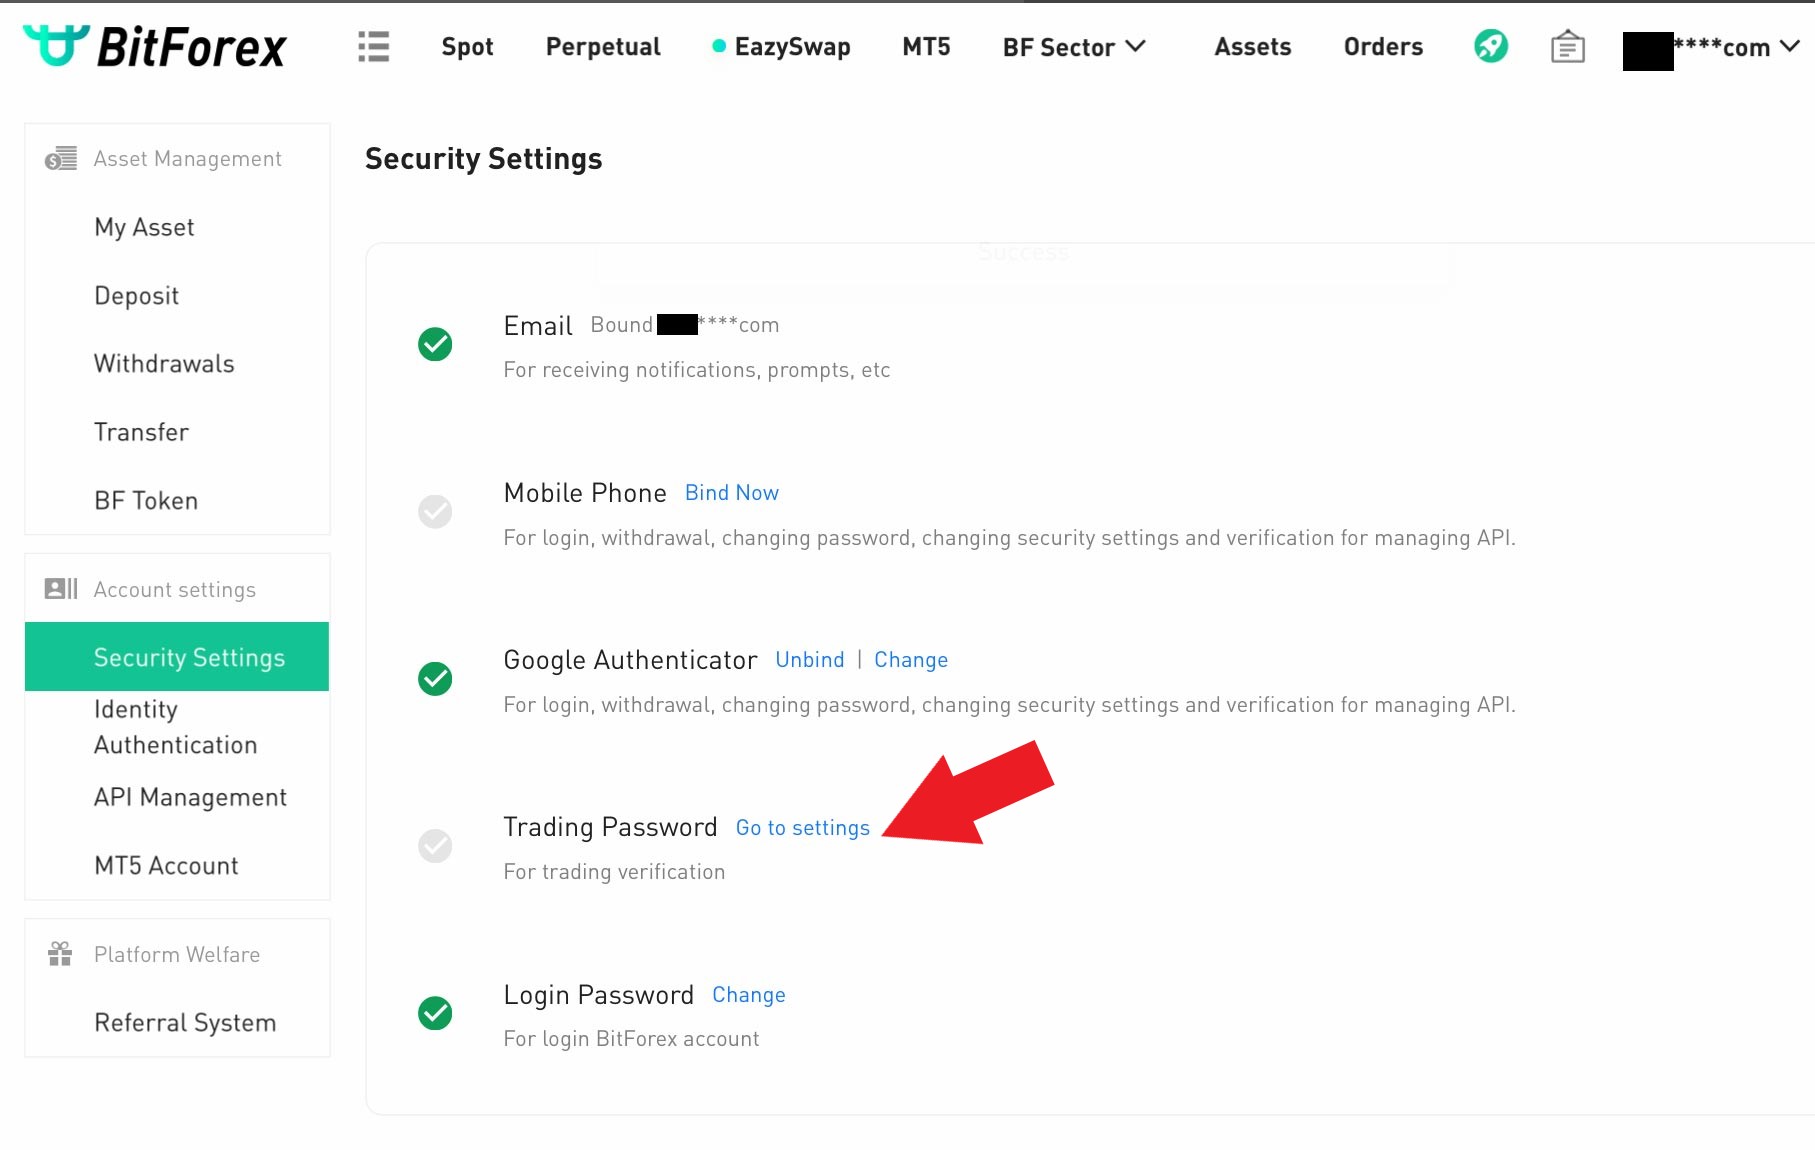
c) Set up Trading Password (This is mandatory for all future trades)
i) Click on Go to settings under Trading Password
ii) Enter a 6-digit password
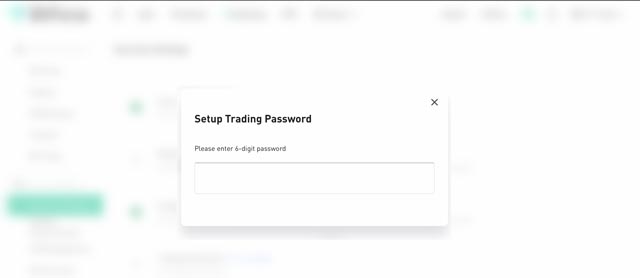
iii) Go to your email for the verification code and enter the Verification Code
iv) Open the Google Authenticator App and enter the Google Verification Code
v) Once complete, the Trading Password will be checked
Step 4 - Register BitForex.com Wallet in Crypto.com Wallet
a) Open Crypto.com app and click on Transfer
![]()
b) Click on Withdraw
![]()
c) Click on Crypto
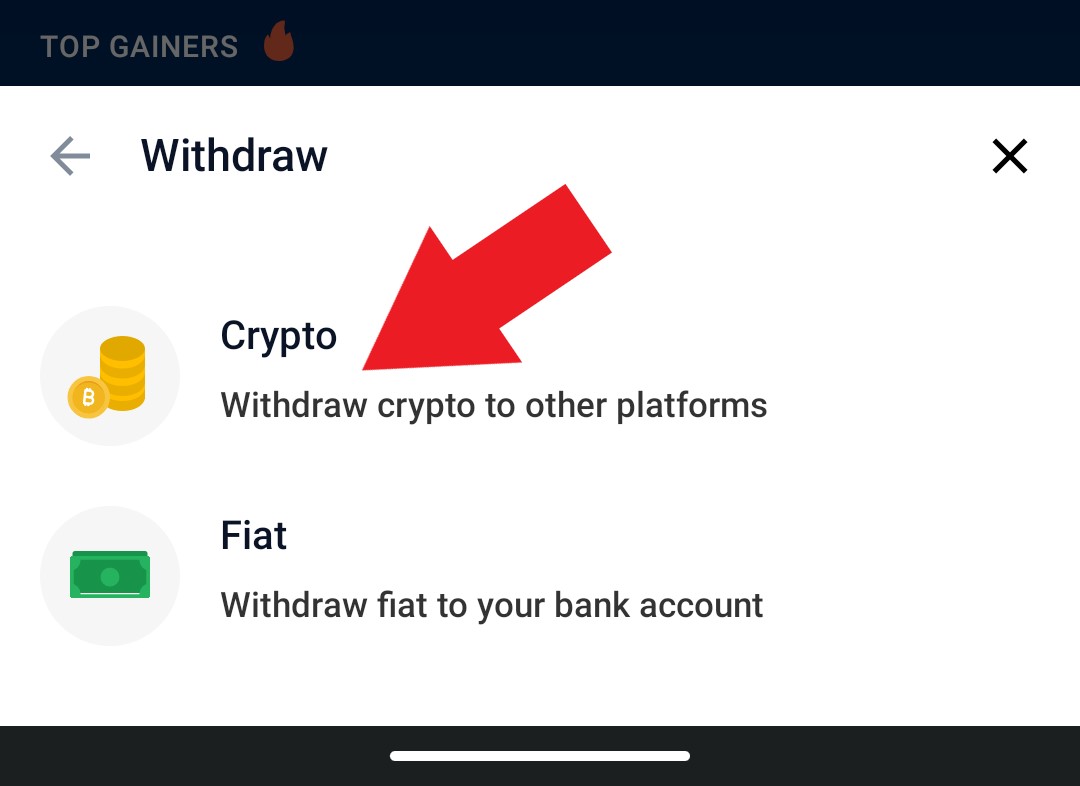
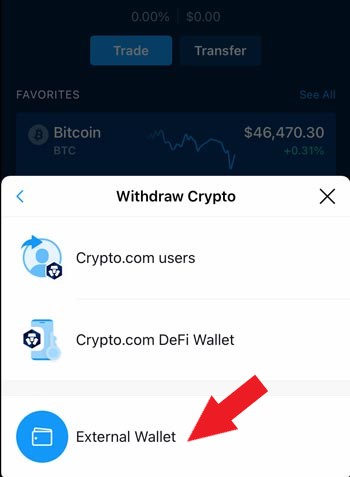
d) Click on External Wallet
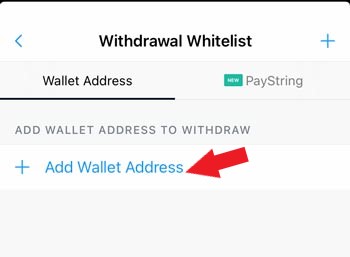
e) Select Add Wallet Address
f) Select Ethereum (Note this example is based on Ethereum)

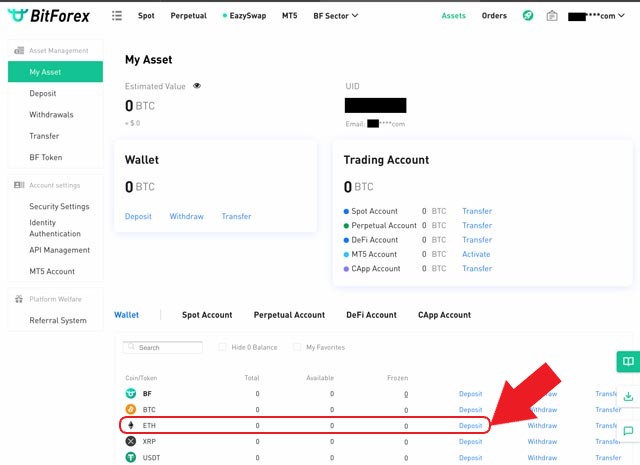
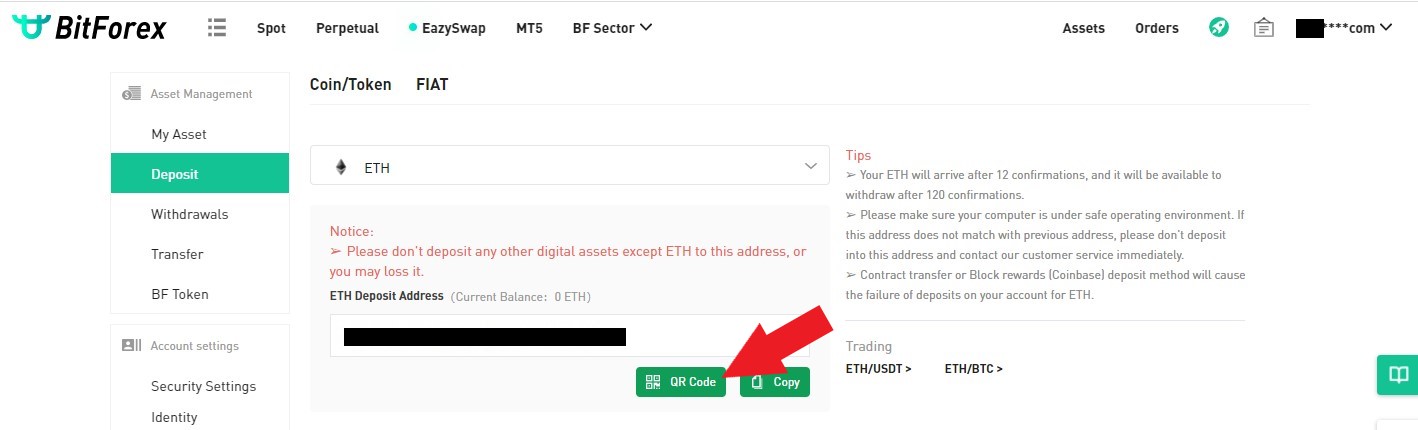
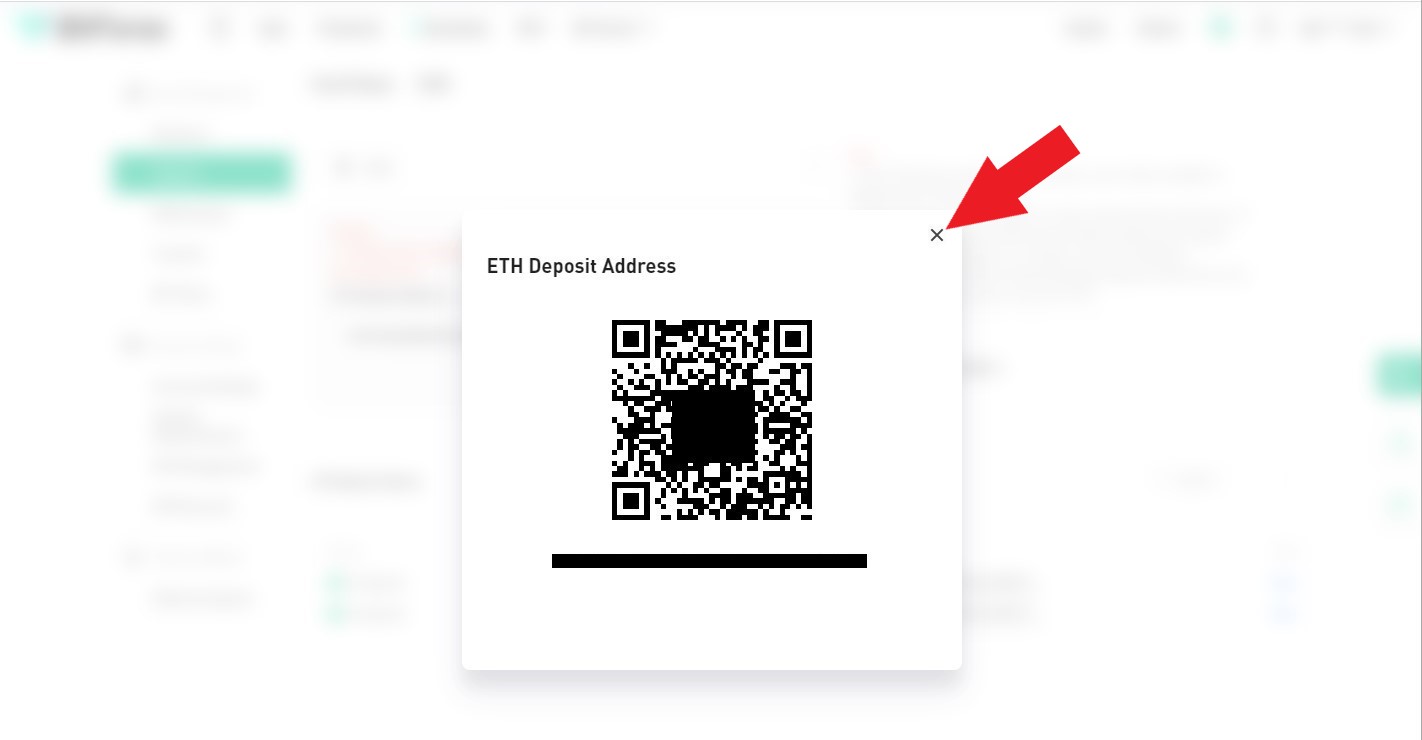
g) Open Bitforex and click on Deposit under Ethereum.
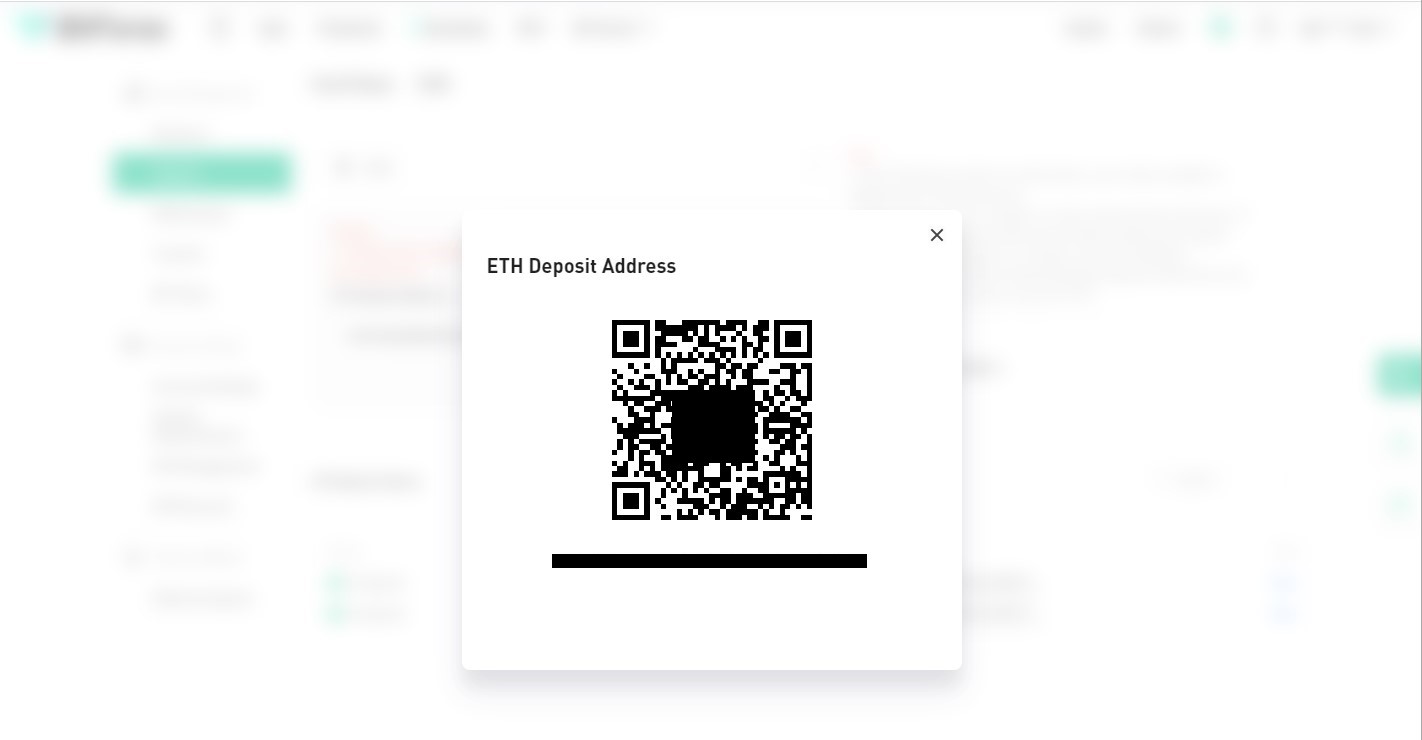
h) Click on QR Code
i) This will open the QR code for you to scan into your Crypto.com app
j) On your Crypto.com app select the QR code symbol
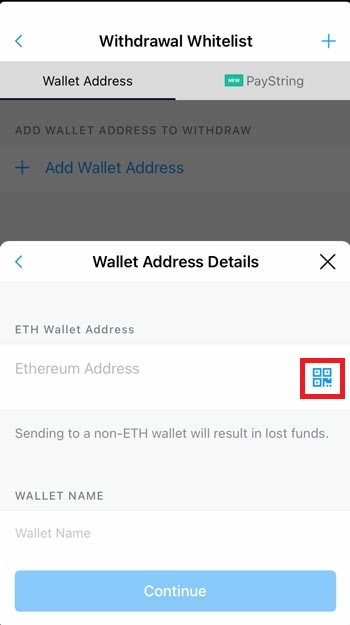
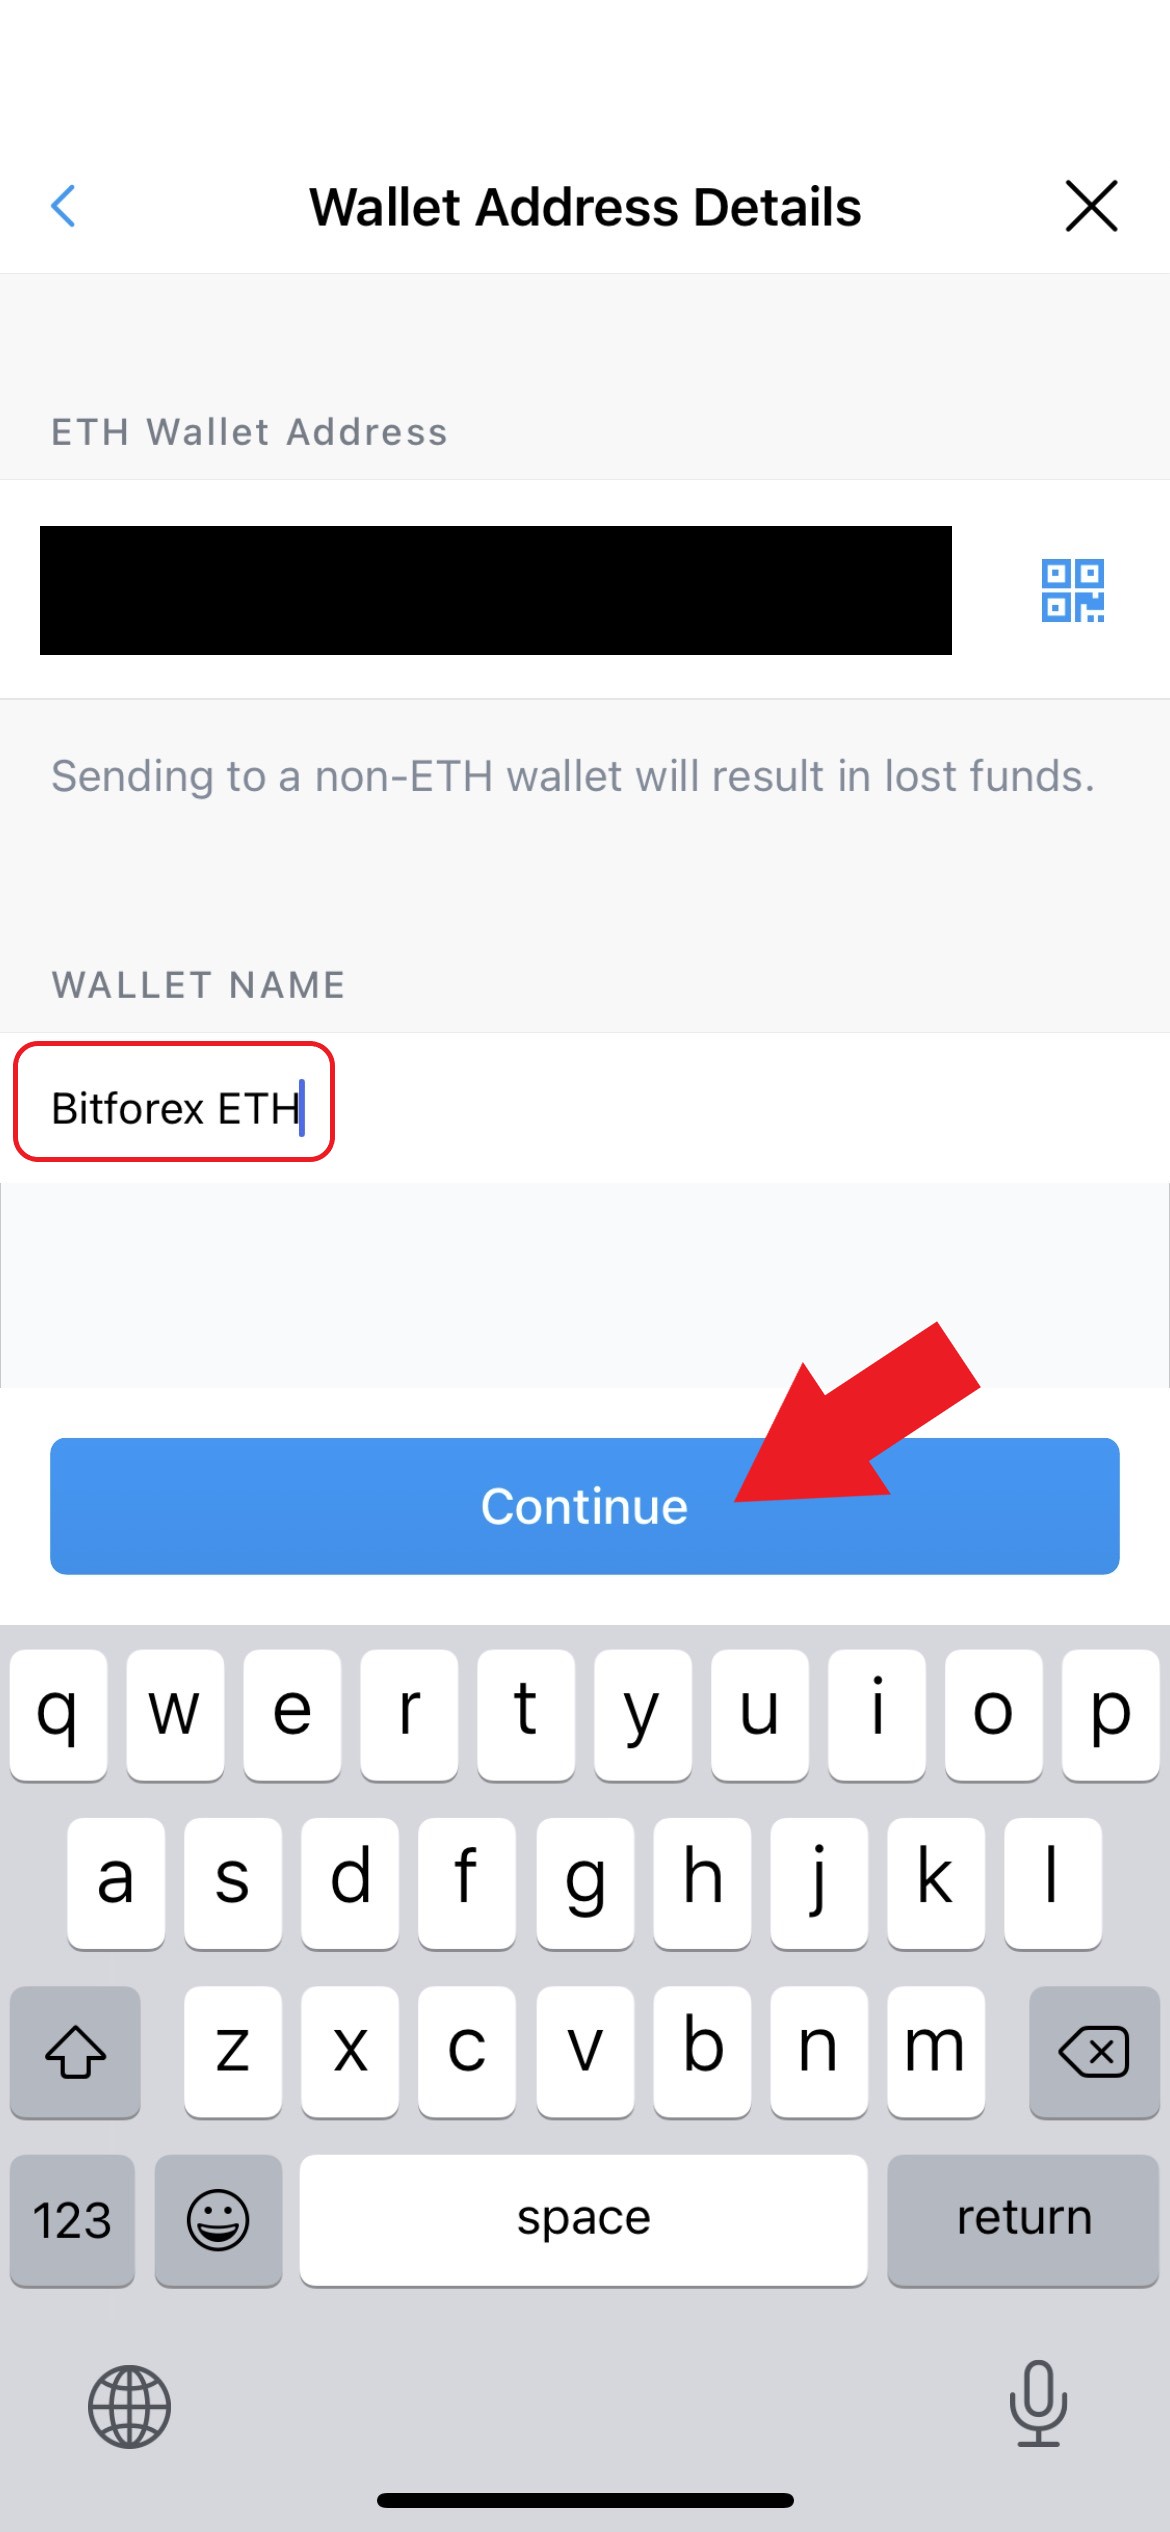
k) Scan the BitForex QR code image and the Ethereum Address will populate on your phone. Input WALLET NAME Bitforex ETH and select Continue.
l) The Check your email to confirm your new wallet address screen will appear. Select Open Email.
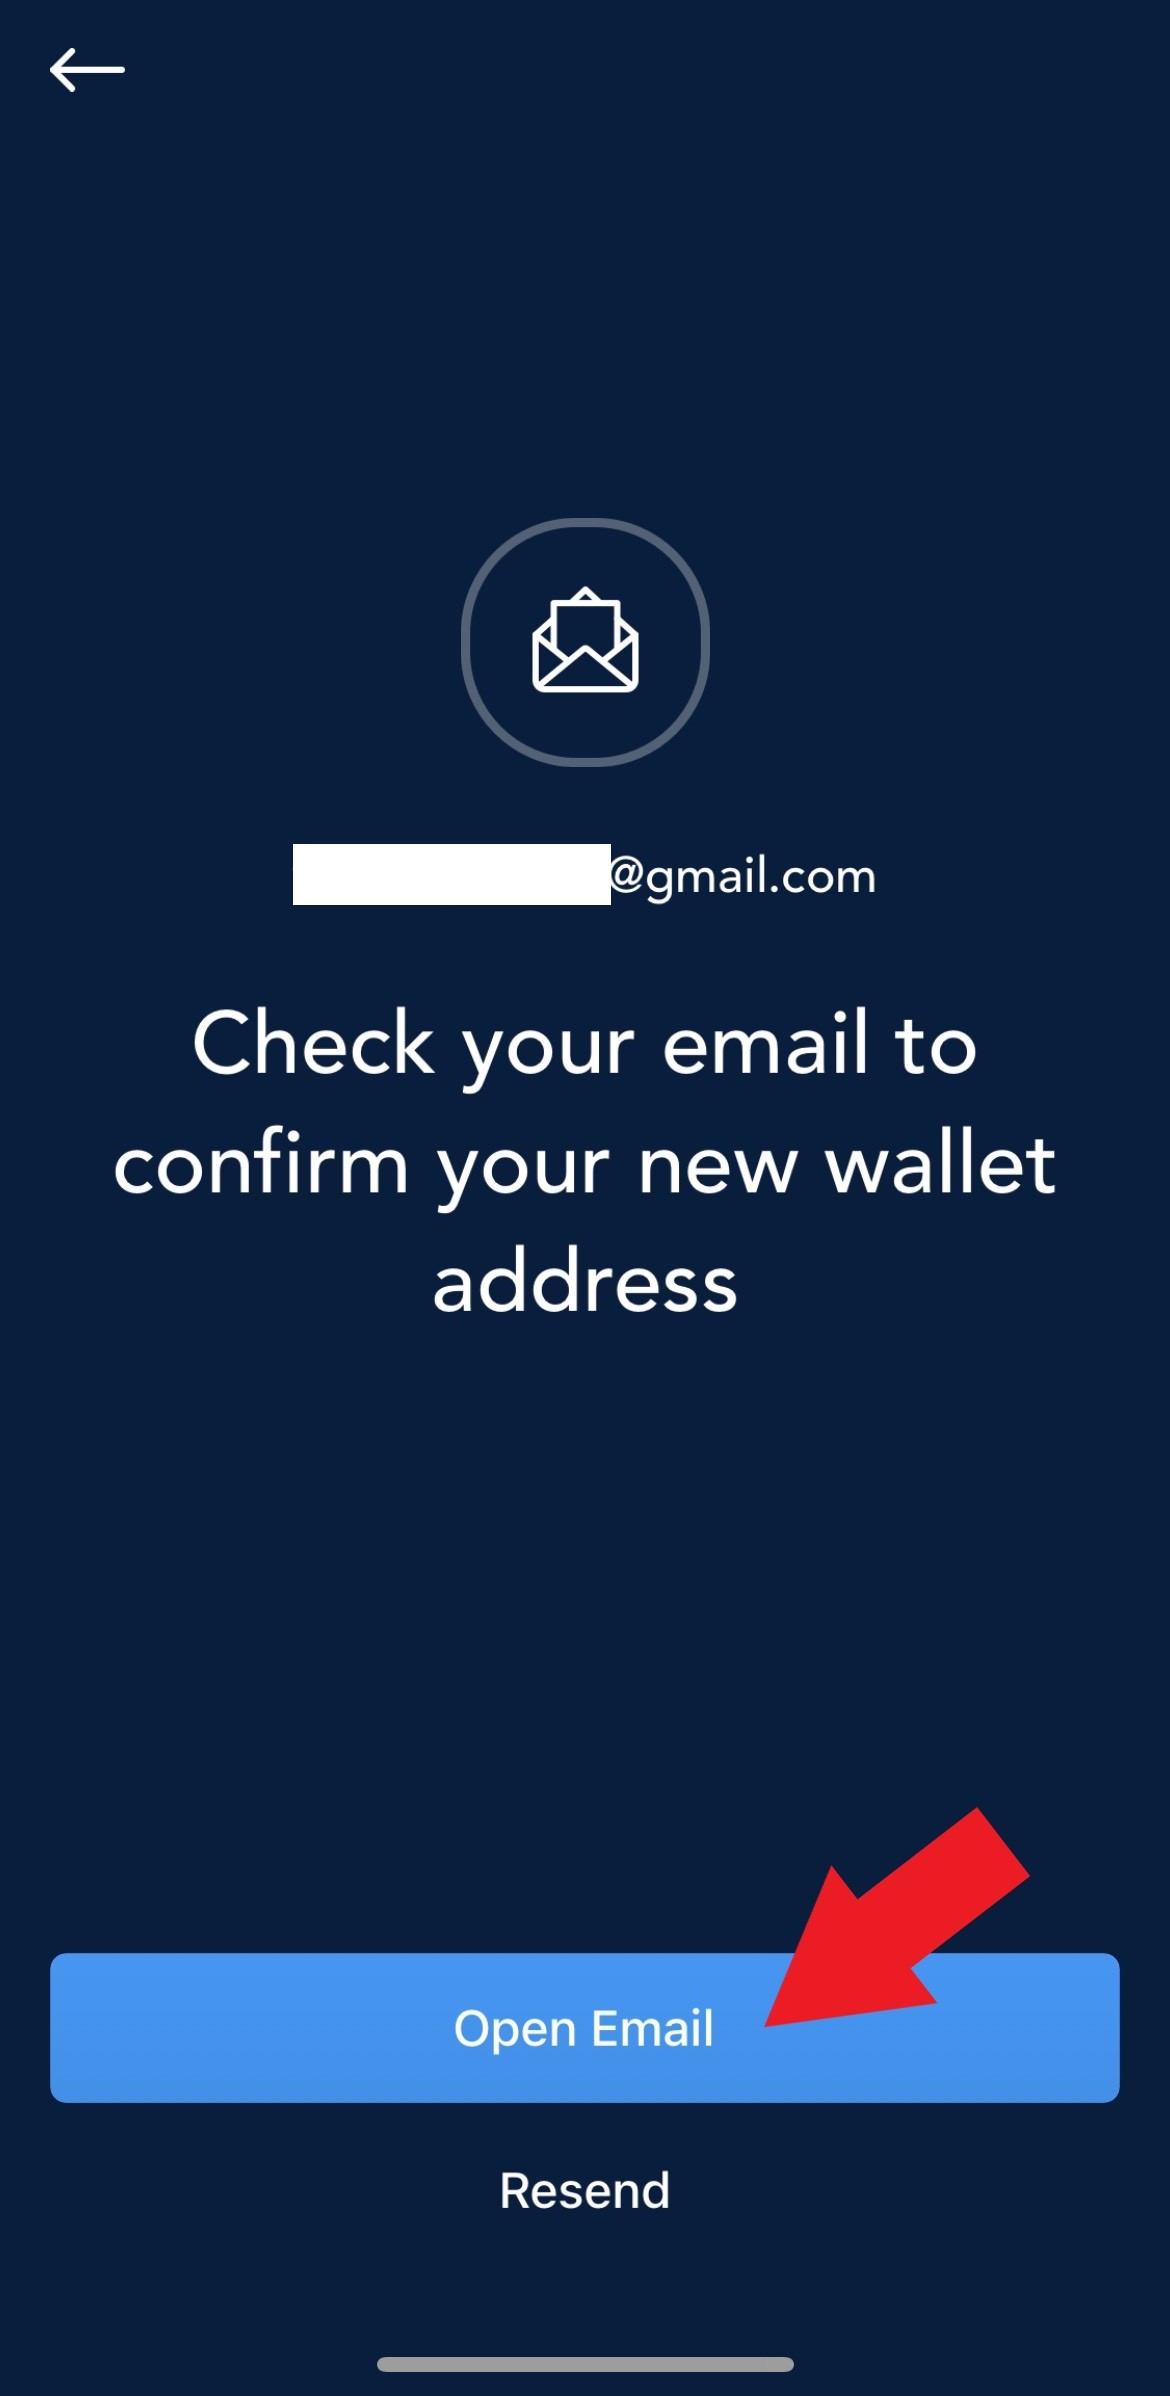
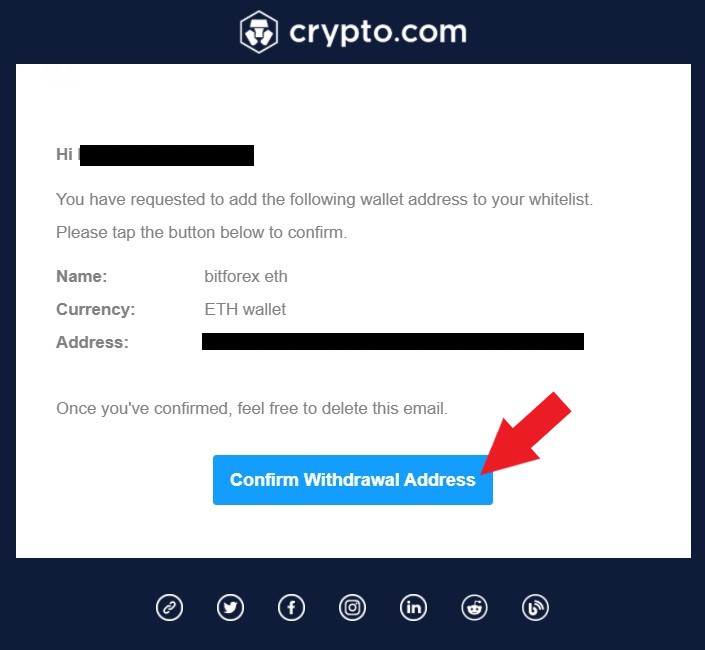
m) Open your email from your mobile phone and select Confirm Withdrawal Address
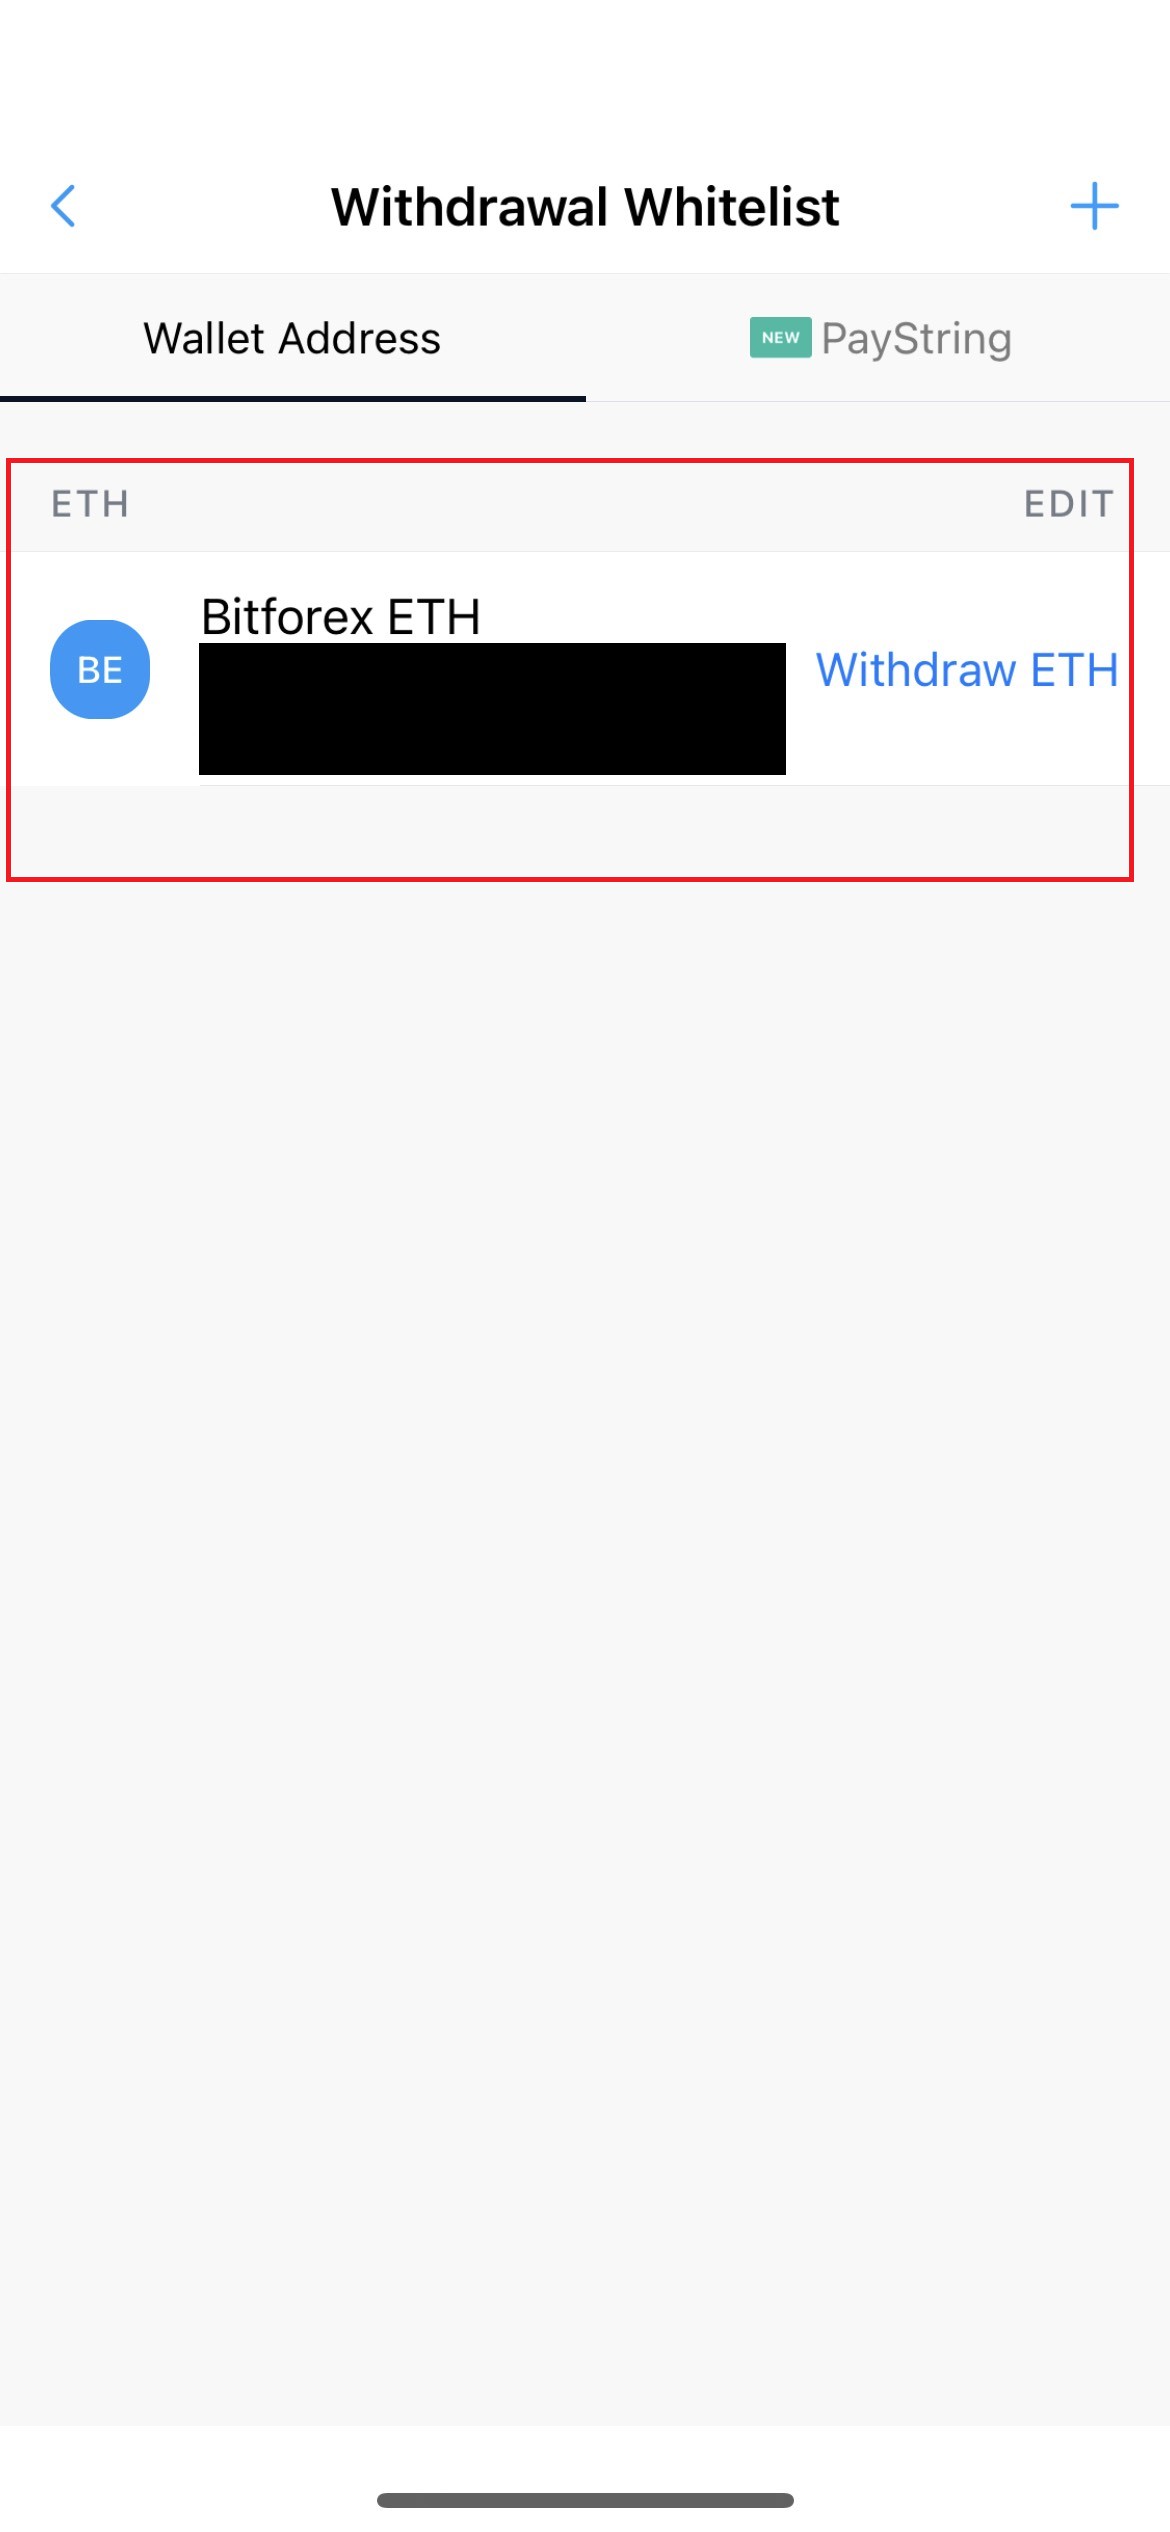
n) The address will appear in your Withdrawal Whitelist (keep this open for Step 5)
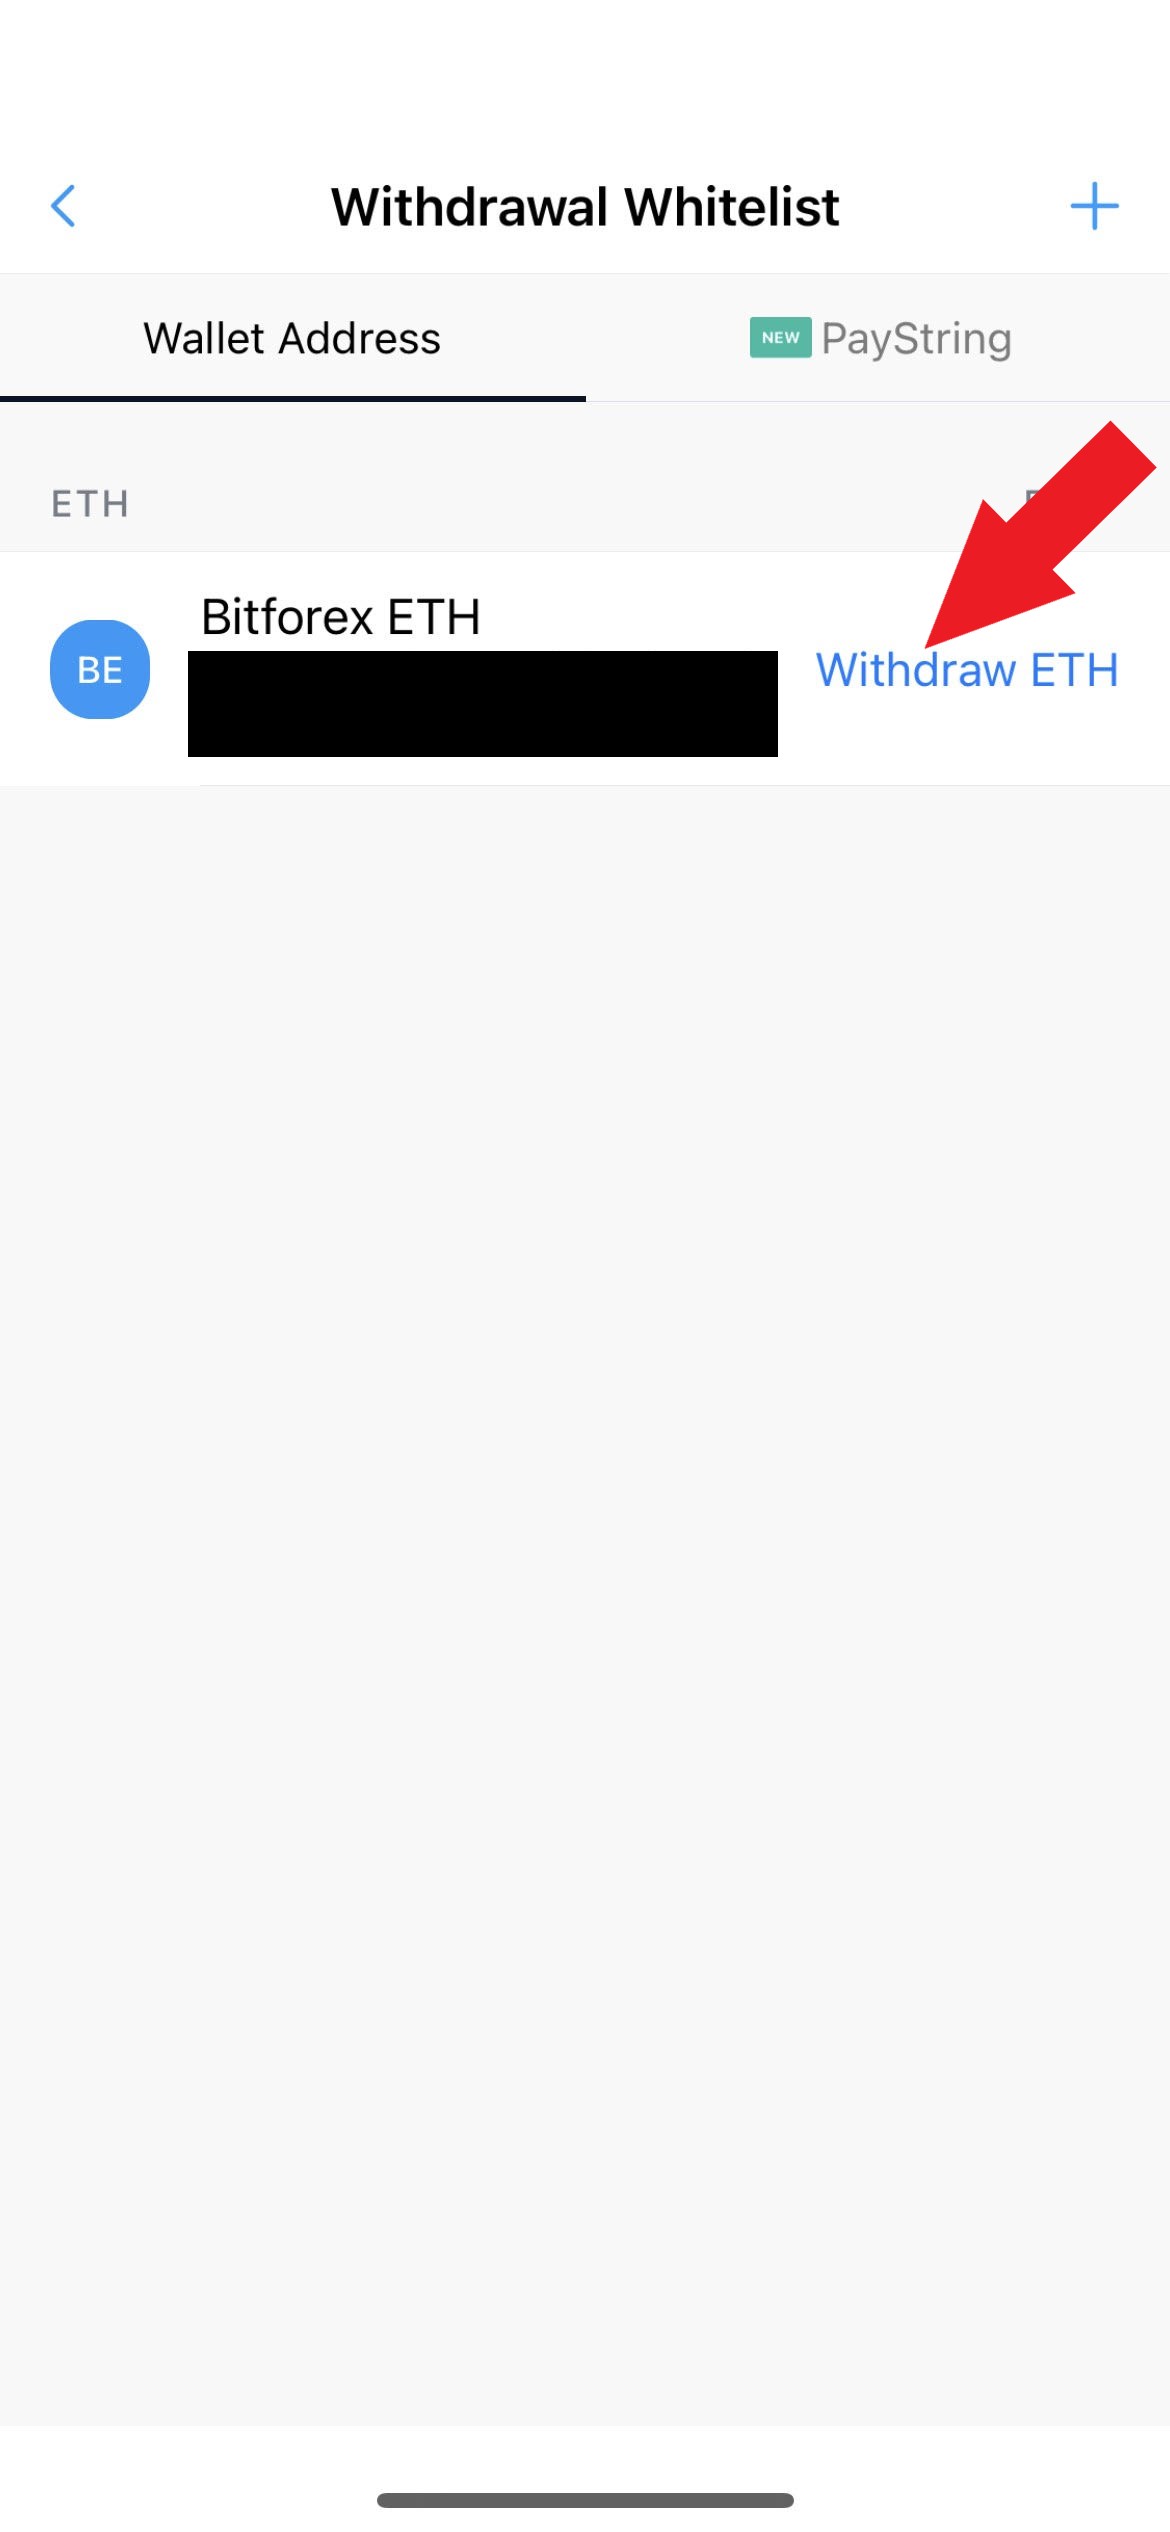
Step 5 - Transfer Ethereum from Crypto.com Wallet to BitForex Wallet
a) Click on Withdraw ETH
b) Select how much ETH in US dollars to transfer, enter notes in Send Note (Optional) and click Withdraw

c) Enter Passcode
d) Tap Anywhere to close the Your ETH withdrawal request has been submitted screen
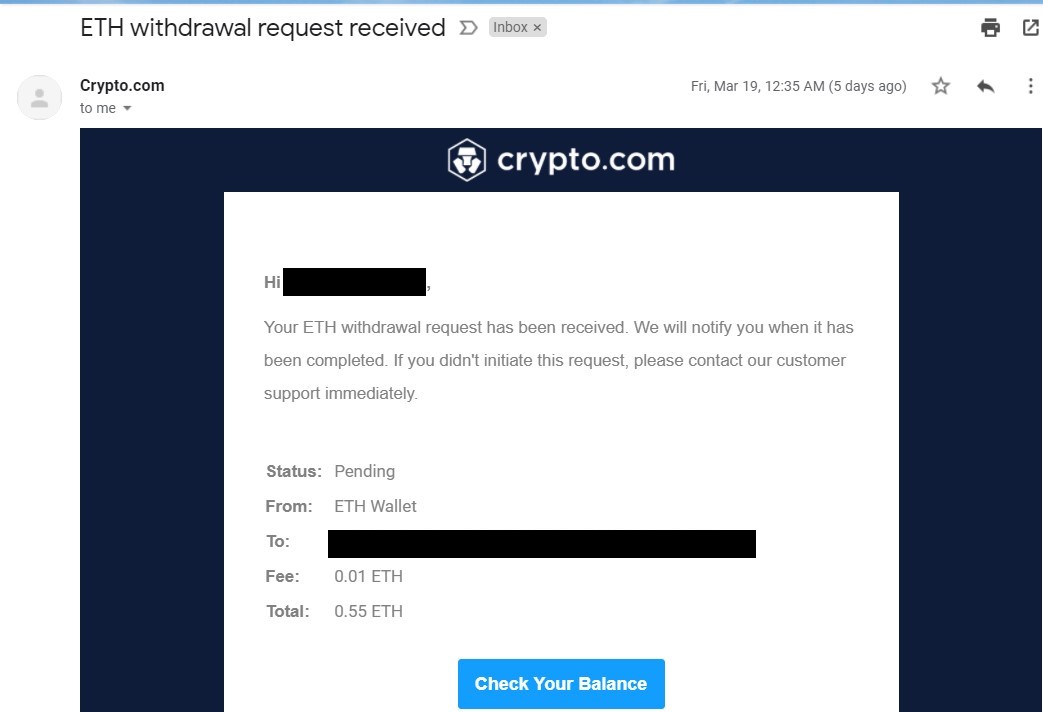
e) You will receive an email notification also confirming the withdrawal request has been received. The transaction will take up to 2+ hours (depending on the time of day)
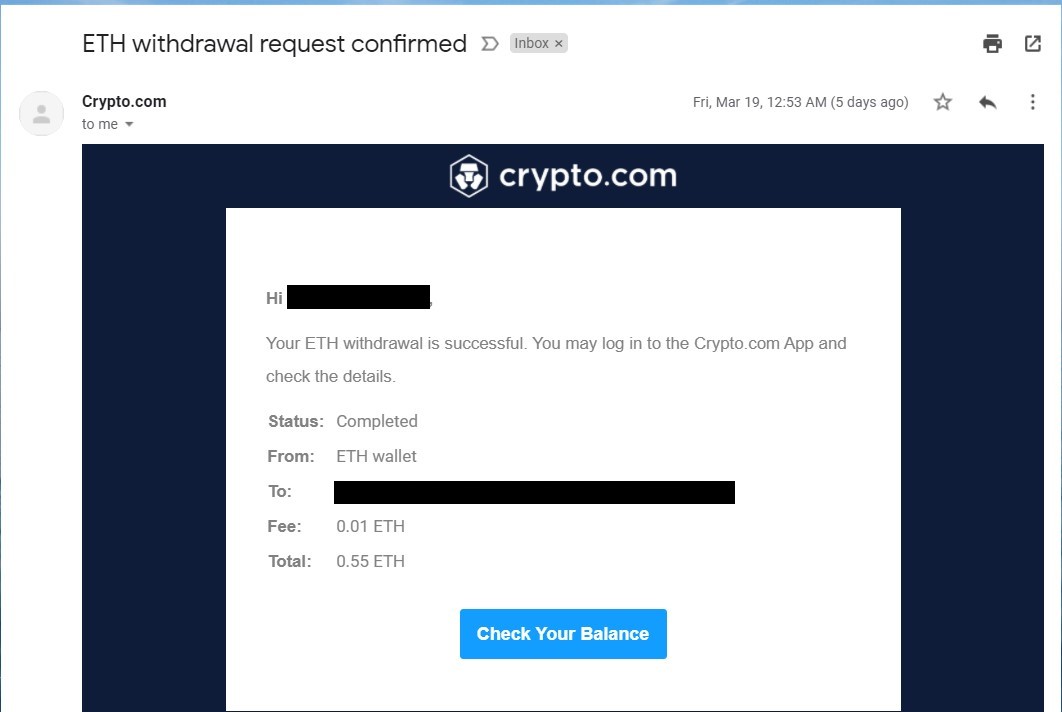
f) Once the withdrawal is complete, you will receive an email notification
Step 6- Transfer ETH from BitForex Wallet to Spot Account
a) On Bitforex, click X to close the QR code window
b) Click on Transfer
![]()
c) Select ETH under Coin/Token, Spot Account, Transfer All, and Continue

Step 7 - Convert Cryptocurrency to USDT (Tether)
a) Sell ETH (Ethereum) for USDT (Tether)
Step 8- Buy OMI (Congratulations on getting this far, you're almost there)
a) Buy OMI Token with USDT (Tether)
References
- What is ECOMI (OMI)? Retrieved 16 March 2021.
- Ecomi (OMI) Token Sale Has Come to a Successful Close. Retrieved 16 March 2021.
- You are here:
-
Home

-
Individuals
- Crypto.com